Tag: posture

  • Shoulder Girdle Stability & Upper Body Integration: Creating Strength Without Tension

    Pilates Essentials Series — Part 6

    Introduction: Why the Shoulder Girdle Is the Unsung Hero of Pilates Technique

    When we think of Pilates fundamentals, the core and pelvis often take centre stage — but the shoulder girdle is just as essential. For teachers, understanding how to cue and organise the shoulder complex is key to helping clients move with ease, reduce neck and upper‑back tension, and build true functional strength.

    The shoulder girdle is a dynamic, mobile structure designed for fluid movement. Yet many clients arrive with stiff necks, rounded shoulders, overactive upper traps, and underactive stabilisers. Without proper alignment and engagement, even simple Pilates exercises can create strain instead of strength.

    In this instalment of the Pilates Essentials Series, we explore how to teach shoulder girdle stability and upper‑body integration in a way that empowers your clients to move freely, breathe fully, and build balanced strength.

    1. Understanding the Shoulder Girdle: A Teacher’s Guide

    The shoulder girdle is not just the shoulder joint — it’s an entire system.

    Key components include:

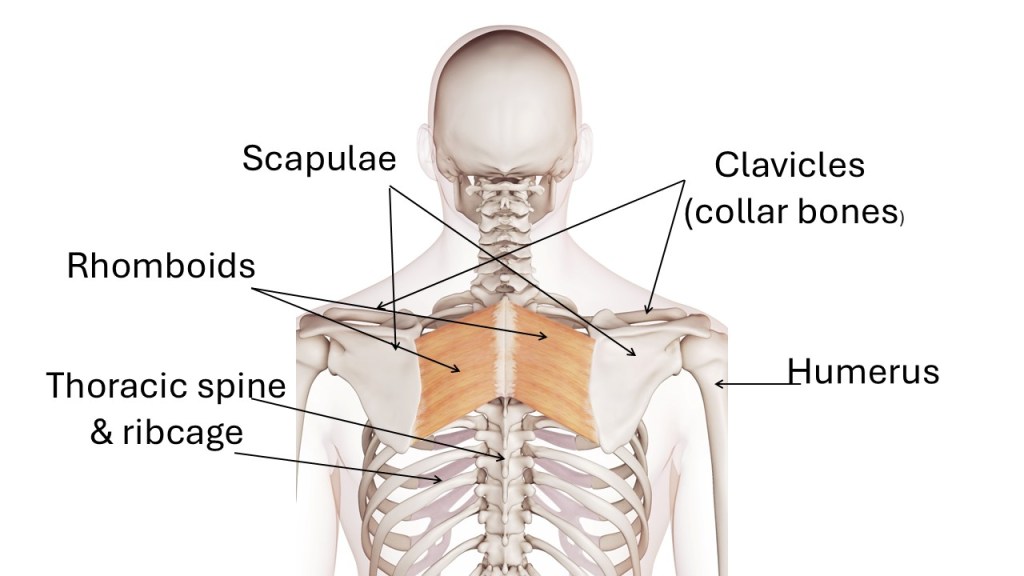
    • Scapulae (shoulder blades)
    • Clavicles (collarbones)
    • Humerus (upper arm bone)
    • Thoracic spine and ribcage
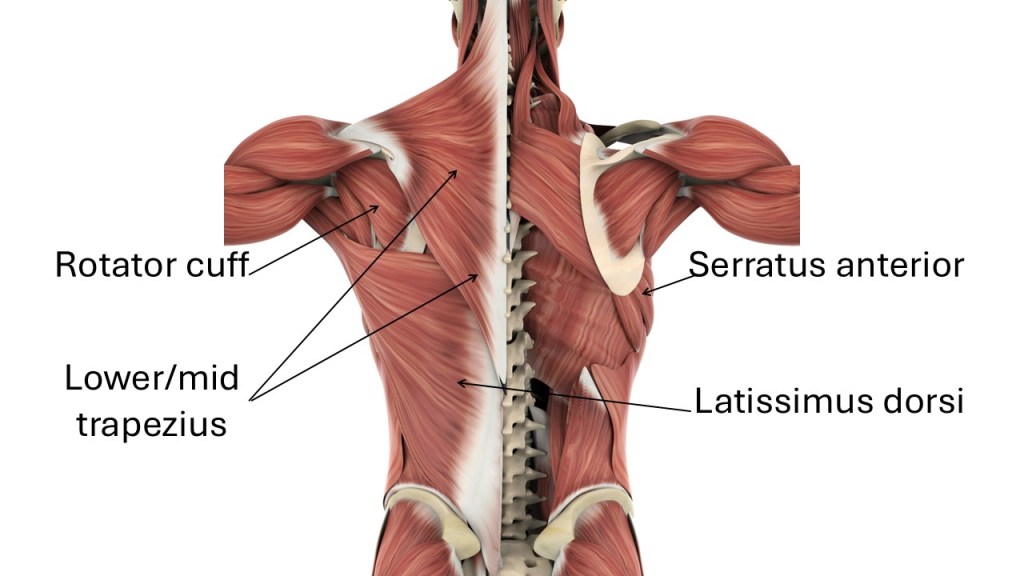
    • Muscles including:
      • Serratus anterior
      • Lower and middle trapezius
      • Rhomboids (above)
      • Rotator cuff
      • Pectorals (chest)
      • Latissimus dorsi

    Why this matters in Pilates

    The shoulder girdle influences:

    • Neck tension
    • Ribcage mobility
    • Breath capacity
    • Core activation
    • Arm strength
    • Posture
    • Load transfer through the spine

    When the shoulder girdle is organised, the entire upper body becomes more efficient and responsive.

    2. The Three Pillars of Shoulder Girdle Stability

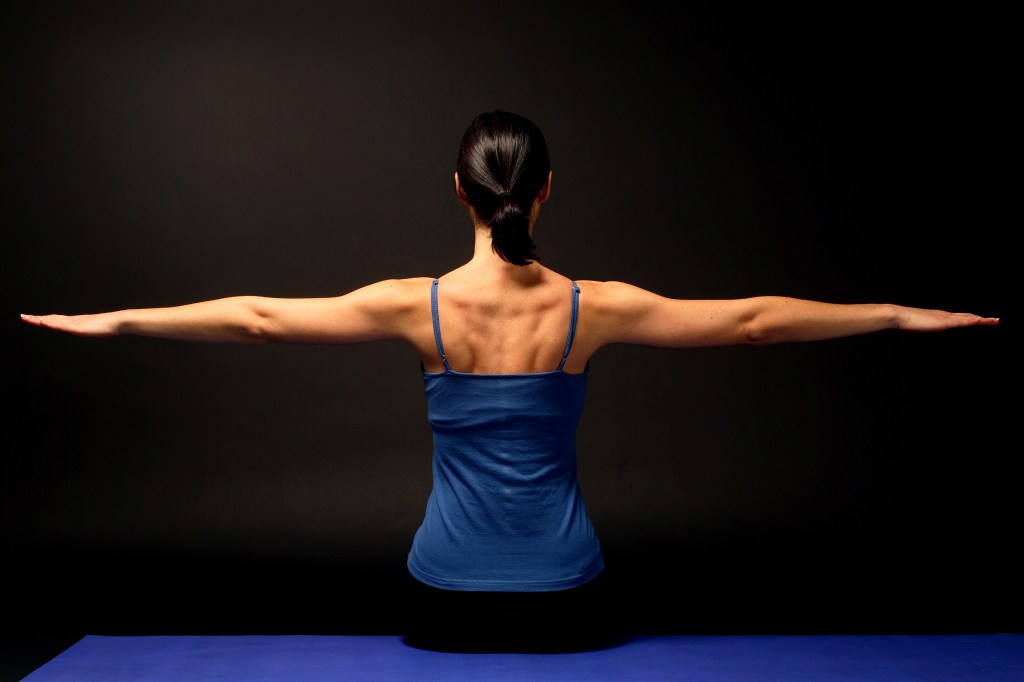
    1. Scapular placement

    The scapulae should rest on the ribcage like “wings,” not pinched together or shrugged upward.

    Neutral scapular placement means:

    • Wide across the collarbones
    • Shoulder blades gently anchored down the back
    • No gripping or forcing

    2. Serratus anterior activation

    This muscle is the secret weapon of shoulder stability.

    It helps:

    • Keep the scapulae flush to the ribcage
    • Prevent winging
    • Support overhead movements
    • Reduce upper‑trap dominance

    3. Balanced mobility

    Stability does not mean rigidity. The shoulder girdle must glide, rotate, and slide to support natural movement.

    3. How Shoulder Girdle Alignment Affects the Whole Body

    a. The neck

    Poor scapular control often leads to:

    • Neck tension
    • Forward-head posture
    • Overuse of upper trapezius

    b. The ribcage

    The shoulder girdle sits on the ribcage — if the ribs are stiff or flared, the shoulders cannot organise well.

    c. The core

    Upper‑body alignment influences:

    • Deep core activation
    • Breath mechanics and efficiency
    • Thoracic mobility

    d. The arms

    Without stable scapulae, arm movements become inefficient and strain the rotator cuff.

    4. Teaching Shoulder Girdle Stability: A Step‑by‑Step Method for Instructors

    Step 1: Build awareness

    Clients must first feel their shoulder blades.

    Use explorations such as:

    • Scapular elevation/depression
    • Protraction/retraction
    • Upward/downward rotation

    Encourage slow, mindful movement.

    Step 2: Introduce neutral scapular placement

    Cue:

    • “Widen your collarbones.”
    • “Let your shoulder blades melt down your back.”
    • “Imagine your shoulder blades sliding into your back pockets.”

    Avoid cues like “pull your shoulders down” — they often create tension.

    Step 3: Layer in breath

    Breath expands the ribcage, which supports scapular placement.

    Cue:

    • “Inhale to widen the ribs; exhale to soften the shoulders.”

    Step 4: Add load gradually

    Once alignment is established, challenge it with:
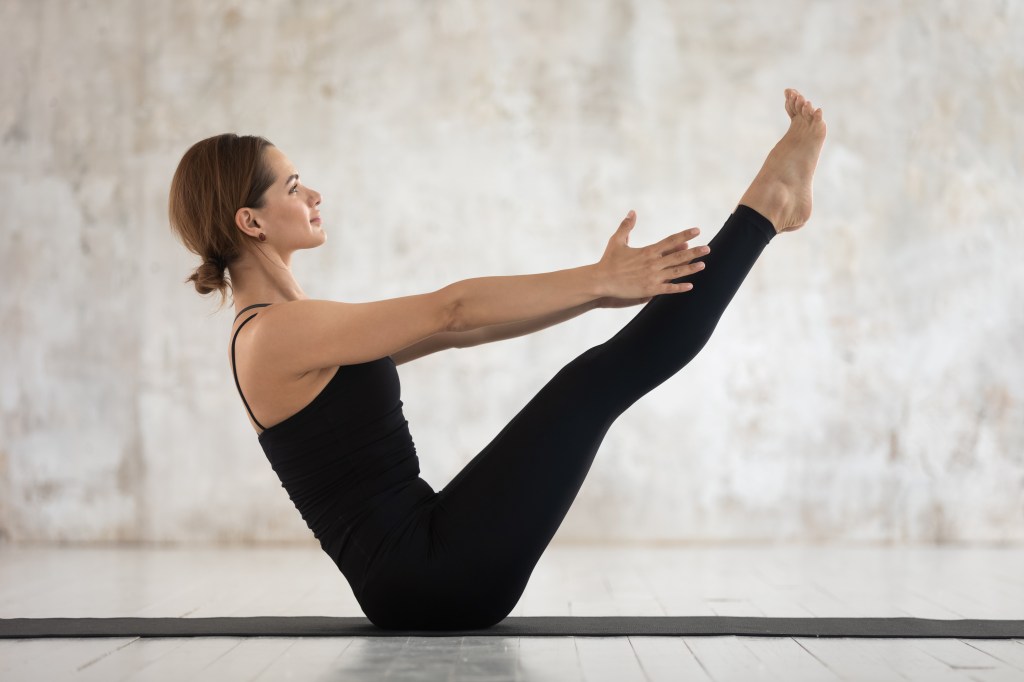
    • Arm arcs
    • The Hundred arm pumps
    • Plank variations

    The goal is maintaining organisation under increasing demand.

    5. Common Shoulder Girdle Issues & How to Correct Them

    1. Over‑shrugging

    Often caused by:

    • Upper‑trap dominance
    • Weak serratus anterior
    • Stress and habitual tension

    Corrections:

    • Cue softening of the shoulders
    • Strengthen serratus anterior
    • Encourage ribcage expansion

    2. Scapular winging

    Often caused by:

    • Weak serratus anterior
    • Poor ribcage mobility
    • Overuse of pecs

    Corrections:

    • Teach protraction with control
    • Strengthen serratus (e.g., wall slides, quadruped work)
    • Improve thoracic mobility

    3. Over‑retraction (“military posture”)

    Often caused by:

    • Over‑cueing “shoulders back”
    • Tight rhomboids
    • Weak lower traps

    Corrections:

    • Cue width across the collarbones
    • Encourage natural scapular glide
    • Strengthen lower traps

    6. Cueing Strategies That Create Real Change

    Use imagery

    • “Imagine your shoulder blades floating on warm water.”
    • “Think of your collarbones as wings spreading wide.”

    Use tactile cues

    With consent:

    • Hands on the scapulae
    • Guiding the shoulder blades into neutral

    Use functional cues

    • “Can you move your arm without your shoulder hiking?”
    • “Can you breathe without your shoulders lifting?”

    Use layered cueing

    Start broad → refine → integrate.

    7. Exercises That Teach Shoulder Girdle Stability Naturally

    1. Scapular isolations

    Build awareness and control.

    2. Angel Arms/Wall slides

    Strengthen serratus anterior and improve upward rotation.

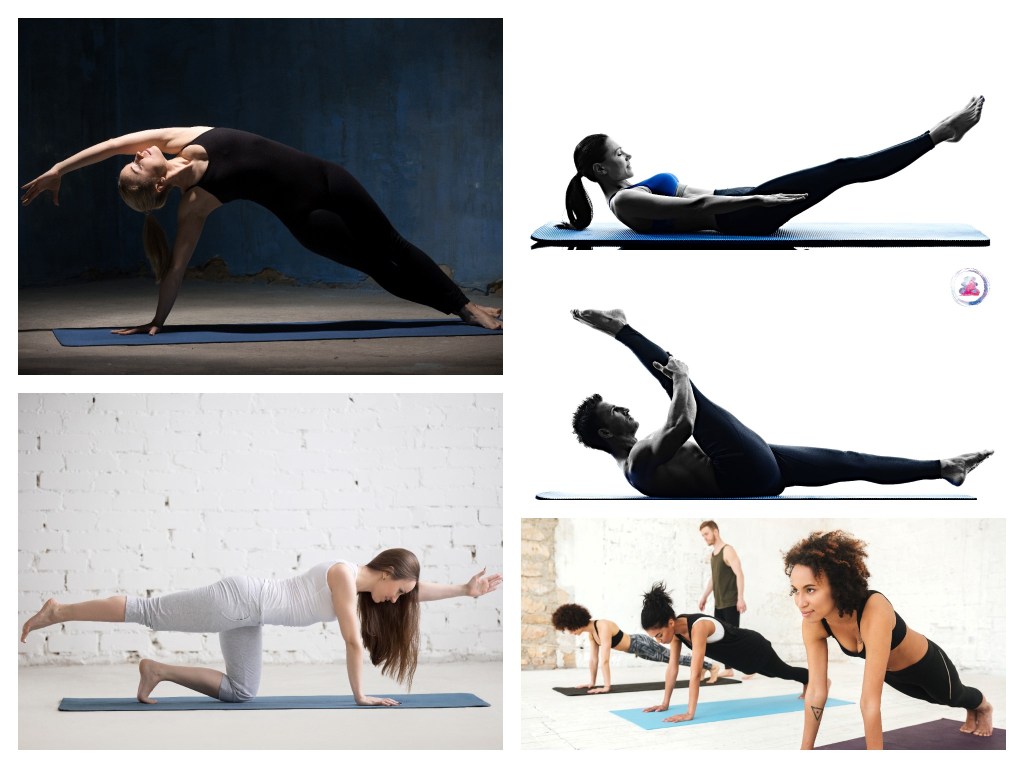
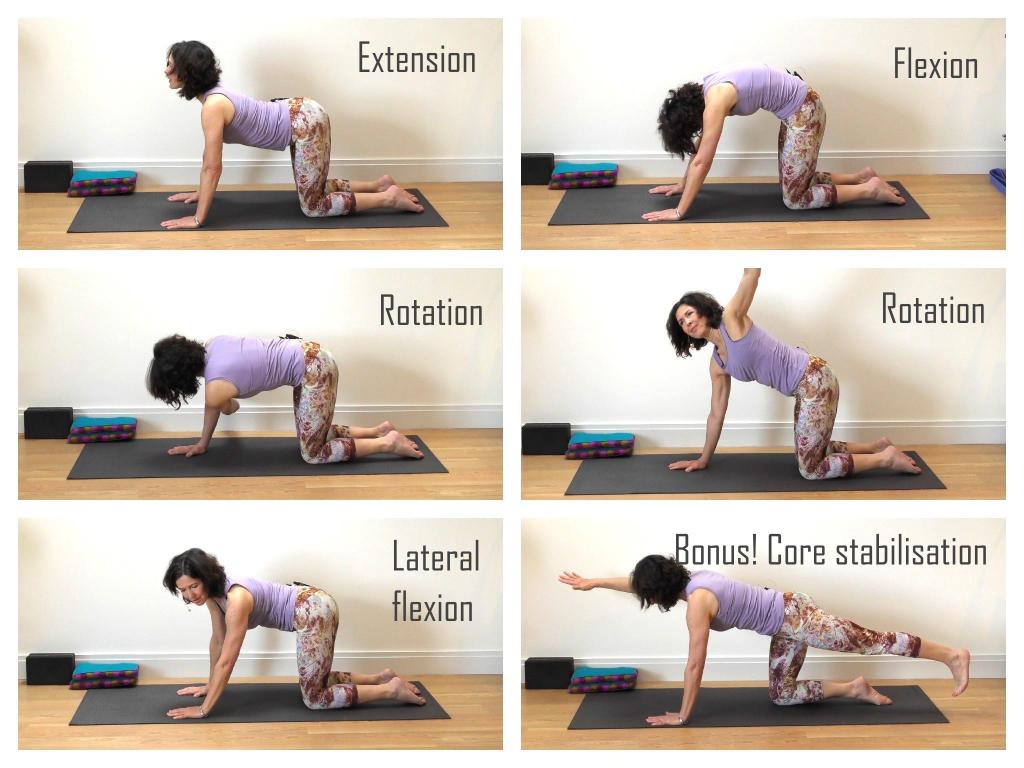
    3. Quadruped arm reach

    Integrates core, shoulder, and ribcage stability.

    4. Plank variations

    Teach load‑bearing with proper alignment.

    5. Arm work

    Challenges stability through resistance (bands or weights).

    8. Progressions for Safe, Effective Upper‑Body Training

    Start with awareness

    Clients must understand scapular movement.

    Add stability

    Introduce neutral placement and breath.

    Add load

    Use arm arcs, resistance, and planks.

    Add complexity

    Rotation, balance, and dynamic transitions.

    Add functional integration

    Standing work, overhead movements, and full‑body sequences.

    9. Why Shoulder Girdle Stability Elevates Your Teaching

    When you teach shoulder girdle organisation well, your clients:

    • Reduce neck and shoulder tension
    • Improve posture
    • Strengthen their upper body safely
    • Move with more confidence
    • Breathe more fully
    • Build long‑term resilience

    And your teaching becomes:

    • More precise
    • More effective
    • More transformative

    Conclusion: Creating Strength Without Tension

    The shoulder girdle is a dynamic, powerful system that supports every upper‑body movement in Pilates. When clients learn to organise their shoulders with ease and awareness, they unlock a new level of strength — one that is grounded, balanced, and free from tension.

    As teachers, our role is to guide them toward this integration with clarity, patience, and thoughtful cueing.

  • Pelvic Alignment & Neutral Spine: Teaching the Cornerstone of Safe Movement

    Part 5 of the Pilates Essentials Series

    Introduction: Why Pelvic Alignment Is the Quiet Powerhouse of Pilates

    If there is one concept that quietly determines the success, safety, and effectiveness of nearly every Pilates exercise, it’s pelvic alignment. For teachers, understanding how to assess, cue, and correct pelvic positioning is essential — not only for technique, but for helping clients build long‑term functional strength, good posture and body awareness.

    Pelvic alignment is the foundation of spinal organisation, core activation, hip mobility, and load distribution. When the pelvis is out of alignment, everything above and below it compensates. When it’s in neutral, the body moves with efficiency, stability and ease.

    In this instalment of the Pilates Essentials Series, we explore how to teach pelvic alignment and neutral spine with clarity, confidence and precision — so your clients can move better, feel stronger and stay injury‑free.

    1. Understanding Pelvic Alignment: The Teacher’s Perspective

    Before we can teach pelvic alignment effectively, we need to understand what we’re looking for.

    The pelvis has three primary positions:

    • Anterior tilt — ASIS forward/down, lumbar spine increases in extension
    • Posterior tilt — ASIS back/up, lumbar spine flattens
    • Neutral pelvis — ASIS and pubic bone aligned

    Why neutral matters

    Neutral pelvis:

    • Supports optimal spinal curves
    • Allows the deep core to activate reflexively
    • Reduces compensatory tension in the hips and lower back
    • Improves load transfer through the kinetic chain
    • Enhances balance and proprioception

    For teachers, neutral pelvis is a functional starting point. It’s the place where the body is most organised and ready for movement.

    2. How Pelvic Alignment Influences the Entire Body

    a. The spine

    The pelvis is the base of the spine. If the base shifts, the spine must adapt.

    • Anterior tilt → increased lumbar lordosis
    • Posterior tilt → flattened lumbar curve
    • Neutral → natural shock absorption and segmental mobility

    b. The core

    Neutral pelvis allows the transversus abdominis, pelvic floor and multifidus to work together. If the pelvis is tilted, one or more of these systems becomes inhibited.

    c. The hips

    Hip flexors, extensors, abductors and rotators all attach to the pelvis. Pelvic misalignment often shows up as:

    • Tight hip flexors
    • Weak glutes
    • Limited hip extension
    • Overactive hamstrings

    d. Movement quality

    Clients with poor pelvic alignment often:

    • Grip with their lower back
    • Overuse superficial abdominals
    • Struggle with balance
    • Lose control during transitions

    Teaching neutral pelvis early creates a foundation for everything that follows.

    3. Teaching Neutral Spine: A Step‑by‑Step Approach for Instructors

    Step 1: Establish body awareness

    Clients need to feel the pelvis move before they can control it.

    Use simple explorations:

    • Pelvic tilts (anterior/posterior)
    • Rocking side to side
    • Circling the pelvis

    These movements help clients understand the range available to them.

    Step 2: Define neutral clearly

    Use tactile, visual and verbal cues:

    • “Imagine your pelvis is a bowl of water — in neutral, the water stays level.”
    • “Your hip bones and pubic bone form a triangle — keep it flat like a tabletop.”
    • “Feel equal weight on both sit bones.”

    Step 3: Layer in breath

    Breath helps release unnecessary tension and supports deep core activation.

    Cue:

    • Inhale to expand the ribs laterally
    • Exhale to gently engage the deep abdominals without forcing a tilt

    Step 4: Add load gradually

    Once neutral is established, challenge it with:

    • Arm movements
    • Leg lifts
    • Bridging variations
    • Quadruped work

    The goal is maintaining alignment under increasing demand.

    4. Common Pelvic Alignment Issues & How to Correct Them

    1. Over‑tucking (posterior tilt dominance)

    Often seen in clients who:

    • Have tight hamstrings
    • Overuse superficial abdominals
    • Fear lumbar extension

    Corrections:

    • Encourage length through the spine
    • Cue the sit bones to widen
    • Reduce abdominal bracing
    • Strengthen hip flexors and spinal extensors gently

    2. Over‑arching (anterior tilt dominance)

    Common in:

    • Can be seen in hypermobile clients
    • Those with tight hip flexors
    • People who stand with “gymnastic/dancer’s posture”

    Corrections:

    • Cue drawing back the ribs
    • Encourage engagement of lower abdominals
    • Stretch hip flexors
    • Strengthen glutes and hamstrings

    3. Lateral pelvic shift or hike

    Often caused by:

    • Glute med weakness on one side
    • Scoliosis
    • Habitual standing patterns

    Corrections:

    • Cue equal weight on both sit bones
    • Strengthen lateral hip stabilisers
    • Use mirrors or tactile feedback

    5. Cueing Strategies That Actually Work

    Use imagery

    Pilates thrives on imagery because it bypasses overthinking.

    • “Imagine your pelvis is a compass — keep north and south aligned.”
    • “Think of your pelvis as a bowl of fruit — don’t spill it.”

    Use tactile cues

    Either client of you with consent:

    • Hands on ASIS
    • Hands on the sacrum
    • Guiding the pelvis through tilt and neutral

    Use functional cues

    • “Can you breathe without your pelvis shifting?”
    • “Can you lift your leg without your back joining in?”

    Use layered cueing

    Start simple → add detail → refine precision.

    6. Exercises That Teach Pelvic Alignment Naturally

    1. Supine pelvic tilts

    Build awareness and control.

    2. Bridge extended leg variation

    Teach hip extension without lumbar compensation.

    3. Dead bug / toe taps

    Challenge neutral under load.

    4. Quadruped arm/leg reach (Box Swim/Superman)

    Integrates core, pelvis and shoulder stability.

    5. Standing weight shifts

    Bring pelvic alignment into functional movement.

    7. How to Progress Clients Safely

    Start with awareness

    Clients must feel the pelvis move.

    Add stability

    Introduce neutral and hold it with breath.

    Add load

    Leg lifts, arm reaches, bridging.

    Add complexity

    Rotation, balance, transitions.

    Add functional integration

    Standing work, balance, gait patterns.

    8. Why Pelvic Alignment Is a Game‑Changer for Teachers

    When you teach pelvic alignment well, you help clients:

    • Reduce back pain
    • Improve posture
    • Strengthen their core
    • Move with confidence
    • Understand their bodies
    • Build long‑term resilience

    It also elevates your teaching:

    • Your cueing becomes clearer
    • Your programming becomes more intentional
    • Your clients progress faster
    • Your sessions become safer and more effective

    Pelvic alignment is not just a concept — it’s a teaching superpower.

    Conclusion: Neutral Pelvis as the Foundation for Everything That Comes Next

    Pelvic alignment and neutral spine are the cornerstones of safe, effective Pilates practice. When clients understand how to organise their pelvis, they unlock better movement patterns, deeper core activation and a more connected mind‑body experience.

    As teachers, our role is to guide them toward awareness, control and confidence — one cue, one breath and one movement at a time.

  • Core Engagement and Stability in Pilates: Building a Strong Foundation

    Why Core Engagement Matters in Pilates

    Part 4  of the Pilates Essentials Series

    The core is the powerhouse of Pilates. In Pilates, core engagement isn’t just about having toned abs — it’s about creating stability, improving posture, and enabling efficient movement. When your core is active, every exercise becomes safer and more effective.

    “A strong centre supports everything else.”

    Benefits of a Strong Core

    • Improved Posture: A stable core supports spinal alignment and reduces strain on joints.
    • Enhanced Balance: Core strength helps maintain equilibrium during dynamic movements.
    • Injury Prevention: Proper engagement protects the lower back and hips.
    • Functional Strength: A strong core translates to better performance in everyday activities.

    Understanding the Core in Pilates

    When we talk about the “core” in Pilates, we mean more than just the rectus abdominis (the six-pack muscles). The Pilates core includes:

    • Transversus Abdominis (TA): The deepest abdominal layer, acting like a corset.
    • Multifidus: Small stabilising muscles along the spine.
    • Pelvic Floor: Supports the organs and works with the TA for stability.
    • Diaphragm: Integral for breath and core activation.
    • Obliques: Assist with rotation and lateral flexion.

    This interconnected system creates a strong, supportive centre for movement.

    How to Cue Core Engagement Effectively

    Teaching core activation is an art. Here are practical cues to help clients find and maintain engagement:

    1. Start with Breath

    Breathwork is the gateway to core activation. Use lateral breathing:

    • Inhale: Expand the ribcage sideways and into the back.
    • Exhale: Draw the navel gently towards the spine, activating the TA without gripping.

    Cue: “Imagine tightening a corset as you exhale.”

    2. Visualisation Techniques

    • “Think of zipping up a pair of jeans.”
    • “Draw your hip bones together without moving them.”

    3. Avoid Common Mistakes

    • Over-bracing: A common mistake is gripping too hard, creating tension.
    • Holding Breath: Keep breathing while engaging.
    • Pelvic Tilt Overload: Engagement should be subtle, not forced.

    Exercises to Build Core Stability

    Here are five Pilates staples for core strength and stability:

    1. The Hundred

    • Purpose: Warm-up and activate deep core muscles.
    • Key Cue: Maintain neutral spine while pumping arms.
    • Modification: Bend knees if needed.

    2. Single Leg Stretch

    • Purpose: Strengthens TA and obliques.
    • Key Cue: Keep pelvis stable as legs move.

    3. Plank/Leg Pull Down (modified)

    • Purpose: Full-body integration with core focus.
    • Key Cue: Avoid sagging hips; draw navel to spine.

    4. Bird Dog

    • Purpose: Stability during limb movement whilst working multifidus.
    • Key Cue: Keep ribs connected and spine neutral.

    5. Side Plank

    • Purpose: Targets obliques and lateral stability.
    • Key Cue: Lift from the core, lift out out the shoulder.

    Take the Time to Connect

    Whether you are teaching or practising Pilates, take the time to

    • Prepare the nervous system: breathe deeply, release tension from body & mind.
    • Find neutral position: the core muscles fire up most effectively in ideal alignment.
    • Feel the natural core activation with the exhale: this makes it easier to hold voluntarily as the mind has connected with the sensation.
    • Lateral/thoracic breathing: hold the contraction and feel the breath move into the ribcage, wide rather than deep.
    • Neuromuscular activation: warm up the core muscles and allow them to prepare for the work to come.

    Integrating Core Engagement into Every Pilates Session

    Core activation isn’t a standalone concept — it should underpin every exercise. Encourage clients (or yourself!) to:

    • Check-in before movement: Activate TA and pelvic floor. Breathe
    • Maintain engagement during transitions: Stability matters between exercises and before you start each exercise.
    • Release when appropriate: Avoid constant gripping; teach dynamic control. Consider at least a minute at the end of class in Savasana.

    Want to deepen your understanding of Pilates fundamentals? Stay tuned for Part 5: Alignment and Posture: Key Principles for Safe and Effective Movement next week!

    Pilates Teacher Training

  • Spinal Mobility in Pilates: Why It Matters and How to Teach It

    Part 3 of the Pilates Essentials Series

    Learn why spinal mobility is essential in Pilates. Discover safe techniques, teaching tips, and warm-up exercises to improve movement quality and reduce back pain.

    Spinal mobility is one of the most important — and most misunderstood — components of Pilates. Whether you’re teaching beginners, seniors, or advanced movers, the spine is the central axis of every exercise. When it moves well, the whole body moves well. When it doesn’t, everything else compensates.

    In my assessments for my teacher training courses, I often see two extremes:

    • Teachers who avoid spinal movement altogether out of fear of “doing it wrong or causing injury”, favouring instead core strength and stability. Pilates is about so much more than just the core.
    • Teachers who dive straight into deep flexion or extension without preparing the body – rolling down from standing at the very beginning of class, for example.

    Both approaches miss the essence of Pilates: mindful, progressive, functional movement that supports the spine rather than stresses it.

    This post will help you understand spinal mobility more deeply and teach it with clarity, confidence, and safety.

    Why Spinal Mobility Matters

    1. A Mobile Spine Is a Healthy Spine

    The spine is designed to move in multiple directions — flexion, extension, rotation, and lateral flexion. When we stop moving it, stiffness sets in, posture declines, and compensations appear in the hips, shoulders, and neck.

    Pilates restores natural movement patterns, helping clients feel lighter, freer, and more aligned.

    2. Spinal Mobility Reduces Back Pain

    Many people experience back pain not because their spine moves too much, but because it doesn’t move enough. Gentle, controlled mobility work:

    • Hydrates the discs
    • Improves circulation
    • Releases muscular tension
    • Encourages balanced movement – and we are made to move

    For seniors, this is especially important as mobility naturally declines with age.

    3. Mobility Improves Core Activation

    A spine that moves well allows the deep core muscles to activate more effectively. When the spine is rigid, clients often grip, brace, or overuse superficial muscles.

    Mobility creates space for the core to do its job.

    4. Mobility Enhances Movement Quality

    Pilates is built on flow, articulation, and control. Spinal mobility improves:

    • Coordination
    • Balance
    • Breath integration
    • Movement efficiency

    It’s the difference between “doing exercises” and moving with intelligence.

    Understanding the Four Directions of Spinal Movement

    1. Flexion

    Forward bending of the spine.
    Used in: Roll Up, Roll Over, Spine Stretch
    Benefits: Lengthens the back body, articulates the spine, strengthens abdominals
    Caution: Avoid deep flexion for clients with disc issues or osteoporosis. Always take a medical history.

    2. Extension

    Backward bending of the spine.
    Used in: Swan, Single Leg Kicks, Swimming.
    Benefits: Strengthens the posterior chain, improves posture and quality of breathing
    Caution: Avoid forcing extension; focus on length, not compression.

    3. Rotation

    Twisting through the spine.
    Used in: Spine Twist, Saw, Criss-Cross.
    Benefits: Improves oblique strength, rib mobility, efficient breathing and gait mechanics.
    Caution: Keep rotation gentle for clients with spinal stenosis, osteoporosis or arthritis.

    4. Lateral Flexion

    Side bending of the spine.
    Used in: Mermaid, Side Bend.
    Benefits: Improves rib and spine mobility, hip function, and balance.
    Caution: Avoid collapsing into the waist; think of lengthening up and over.

    How to Teach Spinal Mobility Safely

    1. Start With Breath

    Breath prepares the spine for movement.

    • Inhale to lengthen or extend
    • Exhale to mobilise or flex

    This creates space and support.

    2. Use Progressive Layers

    Start small, then build:

    • Pelvic tilts → Articulated bridge
    • Seated rotation → Saw
    • Cat/Cow → Swan prep

    This approach is especially important for seniors or beginners.

    3. Cue Length, Not Depth

    Encourage clients to imagine:

    • “Growing taller as you move”
    • “Creating space between each vertebra”
    • “Moving like a wave, not a hinge”

    This reduces compression and encourages articulation.

    4. Respect Individual Differences

    Not all spines move the same way.

    • Some clients are hypermobile
    • Some are stiff
    • Some have structural limitations

    Your job is to guide, not force.

    Warm-Up Exercises for Spinal Mobility

    These are perfect at the start of class.

    1. Cat/Cow (any position)

    Mobilises the entire spine with breath.
    Great for: all levels, seniors, back pain.

    2. Pelvic Tilts

    Gentle articulation of the lumbar spine.
    Great for: core activation, finding neutral, preparing for larger ROM

    3. Seated Spine Rotation

    Encourages rib mobility and oblique activation.
    Great for: beginners, seniors, desk workers.

    4. Mermaid Stretch

    Improves lateral flexion and rib expansion.
    Great for: shoulder release, breathwork integration.

    5. Standing Roll Downs (with preparation)

    Only after breathwork, gentle spine mobility and core activation.
    Great for: hamstring length, spinal articulation, core control.
    Caution: avoid for clients with osteoporosis or disc issues.

    Common Mistakes in Spinal Mobility Work

    ❌ Forcing range of motion

    Fix: Focus on ease, not depth.

    ❌ Moving too quickly

    Fix: Slow, controlled articulation.

    ❌ Over-cueing

    Fix: Use simple, sensory cues.

    ❌ Ignoring breath

    Fix: Pair every movement with inhale/exhale patterns.

    ❌ Not offering regressions

    Fix: Provide options for every spine.

    Case Study: The Power of Gentle Mobility

    One of my senior clients arrived with chronic stiffness, back pain and fear of movement. We began with breath-led pelvic tilts, seated rotation, and supported lateral flexion. Within weeks, she reported:

    • Less morning stiffness
    • Better balance
    • More confidence in daily movement
    • Reduced pain

    Her words: “I feel like my spine has woken up again.”
    This is the magic of mindful mobility.

    Key Takeaway

    Spinal mobility is not about bending further — it’s about moving better. When taught with breath, clarity, and respect for individual bodies, it transforms posture, reduces pain, and enhances every Pilates exercise that follows.

    Teach it slowly. Teach it mindfully. And your clients will feel the difference in every part of their practice.

    If you missed my post on the importance of a warmup, this is a good opportunity to read now.

    Learning or Teaching Pilates is about so much more than movement instructions. I can help you get the most out of this amazing practice.

    #Pilates #mobility #spinehealth #posture #movement