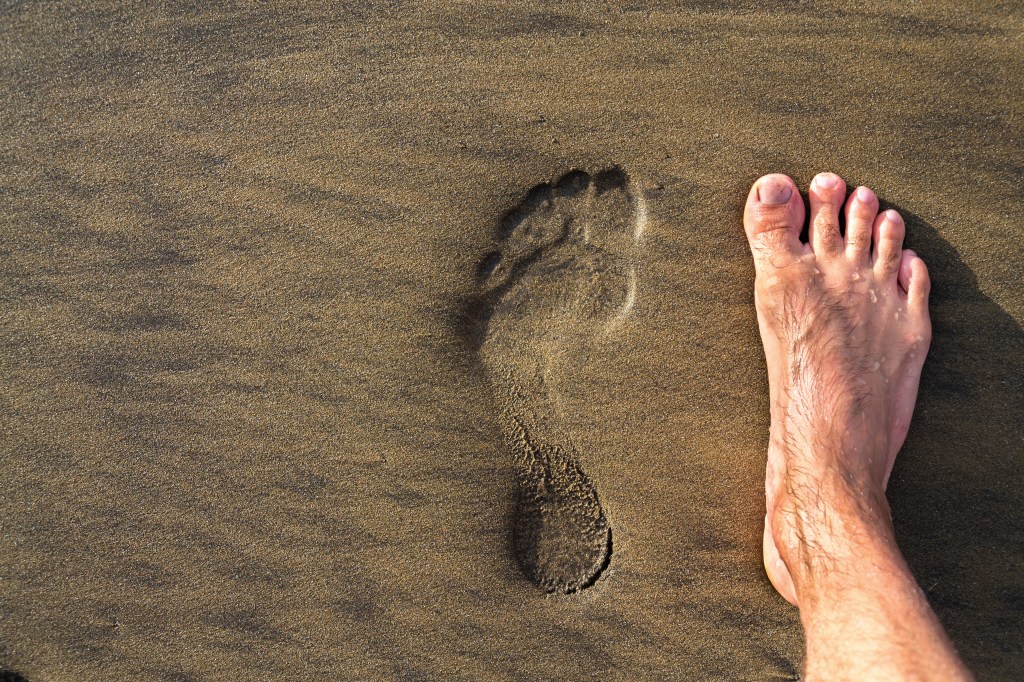
When we talk about posture, most people immediately think of shoulders, spine, or head position. But the real story starts much lower. The feet are your first point of contact with the ground — their foundation, their sensory interface, and often the origin of the patterns we see further up the chain.
Why the feet matter more than we think
Every step, every standing position, every shift of weight begins with the feet. When the feet collapse, stiffen, grip, or rotate, the body adapts above:
knees spiral in or out,
hips shift,
the pelvis tilts,
the spine compensates,
the ribcage adjusts,
the head follows.
It’s never “just the feet”. It’s the beginning of a whole‑body conversation.
Pronation vs. supination
Pronation and supination are not “good” or “bad”. They are natural movements. Problems arise only when a client gets stuck in one pattern.
What to look for:
Does one foot pronate more than the other?
Does the client load the inside or outside edge of the foot?
Do they grip with their toes?
Do they collapse through the arch when tired?
These small details often explain the knee, hip, or back patterns you see later.
Case Studies
The Client with Back Pain
A client started to complain of lower back/back sacro-iliac pain. I asked about her footwear and she said she’d bought a new pair of running shoes a month before. They turned out to be for pronators – a bit of a buzz word at the time. My client had high arches and leaned more towards suppination. The shoes were forcing her even further onto the outer edges of her feet putting stress through the pelvis, hence the pain. She changed her shoes, problem solved.
The Client’s Son with Knee Pain
I used to see my client on a Wednesday and there often seemed to be an issue with her son not wanting to go to school. During conversation, Wednesday was sports afternoon and he would come home with pain on the inside of his knees. I suggested they go to a sports shop where they could get his gait properly assessed and choose new trainers to suit his needs. His issue was pronation, causing his knees to collapse inwards and cause the knee pain. Once he had the correct footwear, the pain disappeared.
How to observe foot posture in standing and walking
In standing:
Look at the heel bone — is it vertical or tilted?
Observe the arches — lifted, collapsed, or asymmetrical?
Notice weight distribution — front/back, inside/outside?
Check toe activity — relaxed or gripping?
Check the knee position.
In walking:
Watch the heel strike — soft or heavy?
Observe the roll‑through — smooth or abrupt?
Look for a “quiet” foot vs. a “noisy” foot.
Notice if one foot behaves differently from the other.
Tests to build awareness
Stand barefoot and shift weight slowly from side to side — what changes?
Lift all ten toes, then place them down one by one — what wakes up?
Walk slowly and notice which part of the foot meets the floor first? Notice the roll of the foot and points of contact, the difference in the two feet.
These simple drills can reveal a lot!
If you enjoy exploring posture from this deeper, whole‑body perspective, my new Postural Assessment course goes further into how to observe, interpret, and work with these patterns in your clients.
As movement professionals, we talk about posture all the time — but not always in the way our clients need. Too often, posture gets reduced to “stand up straight” or “pull your shoulders back”, when in reality it’s a living, adaptive, expressive behaviour shaped by breath, emotion, habit, load, and environment. You can’t always know what’s going on in someone’s life in a large class, so be aware of how life influences posture.
Posture isn’t a shape: it’s a story
This new series, Decoding Posture: A Movement Professional’s Guide, is designed to help you see that story more clearly — in your clients, in your classes, and even in your own body. We’ll explore posture from the ground up, looking at the subtle patterns, compensations, and relationships that influence alignment far more than any single muscle ever could.
Across the coming weeks, we’ll dive into:
how the feet shape everything above,
why knees and ankles reveal more than you think,
the pelvis as a dynamic power centre,
the truth about spinal curves,
the influence of breath and the ribcage,
the misunderstood world of shoulders and head position,
and how posture changes when we move.
If you’re a Pilates teacher, yoga instructor, PT, or movement educator who wants to deepen your eye for alignment, this series will give you practical, compassionate, and science‑informed tools you can use straight away.
We’ll begin where all posture begins — with the feet.
Pilates is often taught and learned in pieces — breath here, core engagement there, a cue about alignment, a reminder about flow. But the true power of Pilates emerges when these elements come together in a cohesive, intentional way. Integration is where the method becomes more than a collection of exercises. It becomes a system.
For teachers, the ability to integrate the essentials — breath, alignment, core engagement, mobility, stability, and the classical principles — is what elevates your teaching from good to exceptional. It’s what helps clients progress safely, move intelligently, and experience the full transformative potential of Pilates.
In this final instalment of the Pilates Essentials Series, we explore how to weave all the foundational concepts into sessions that are safe, effective, and deeply impactful.
1. What Integration Really Means in Pilates
Integration is the process of bringing all the essentials together so the body moves as a connected, coordinated system.
Integration means:
Breath supporting movement
Core engagement stabilising the spine
Pelvic alignment organising the lower body
Shoulder girdle stability organising the upper body
Hip mobility allowing efficient movement
Spinal mobility supporting fluidity
The Pilates principles guiding the experience
Why integration matters
Clients who learn to integrate:
Move with more ease
Build strength without strain
Reduce compensations
Improve posture
Develop body awareness
Progress more quickly
Integration is where Pilates becomes whole‑body movement, not isolated effort.
2. The Teacher’s Role in Integration
As teachers, we are not just teaching exercises — we are teaching movement. Integration requires us to think beyond choreography and focus on the underlying mechanics and principles.
Your role includes:
Observing movement patterns
Identifying compensations
Choosing exercises that support the client’s needs
Layering cues to build understanding
Progressing or regressing exercises appropriately
Creating flow and continuity
Encouraging awareness and curiosity
Integration is a skill — and like any skill, it develops with practice, intention, and reflection.
3. Building a Session That Integrates the Essentials
A well‑designed Pilates session has a clear structure that supports integration. While every teacher has their own style, most effective sessions follow a similar arc.
Step 1: Grounding & Breathwork
Begin by helping clients arrive in their bodies.
Purpose:
Establish presence
Reduce tension
Connect breath to movement
Prepare the nervous system
Examples:
Supine breathing
Seated rib expansion
Gentle pelvic tilts
This sets the tone for mindful, embodied movement.
Step 2: Warm‑Up & Mobility
Prepare the spine, hips, and shoulders for more complex work.
Purpose:
Increase circulation
Mobilise key joints
Build awareness
Introduce alignment cues
Examples:
Cat–cow
Hip circles
Scapular glides
Spinal articulation
This is where clients begin to integrate breath, alignment, and mobility.
Step 3: Core Activation & Stability
Before adding load or complexity, establish stability.
Purpose:
Activate deep core muscles
Support the spine
Build control
Examples:
Dead bug variations
Toe taps
Bridging
Quadruped arm/leg reach
This is the foundation for safe, effective movement.
Step 4: Strength & Integration Work
This is the heart of the session — where the essentials come together.
Purpose:
Build strength
Challenge stability
Integrate upper and lower body
Apply the Pilates principles
Examples:
Posterior and anterior strengthening – Swimming, Single Leg Stretch
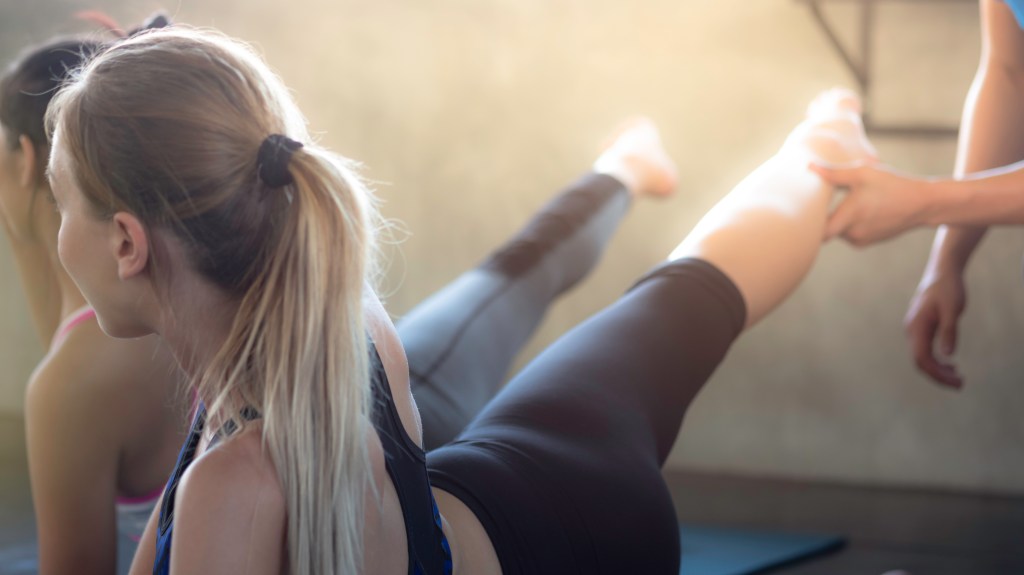
Side‑lying leg series
Plank variations
Standing balance work
This is where clients experience whole‑body integration.
Step 5: Flow & Coordination
Introduce sequences that encourage rhythm, continuity, and control.
Purpose:
Enhance coordination
Build endurance
Deepen the mind–body connection
Examples:
Choose exercises that transition well to the next
Pick 4 exercises and build in intensity with each cycle
For advanced, string 8 to 10 exercises together with low reps (similar to yoga vinyasa)
Flow brings the session to life.
Step 6: Cool Down & Reflection
End with grounding, stretching, and awareness.
Purpose:
Reduce tension
Integrate the work
Encourage reflection
Support recovery
Examples:
Supine relaxation
Supine spinal rotation
Hamstring stretch with a long hold
Gentle breathing exercises to stimulate parasympatheric system
Mindful stillness
This helps clients leave feeling balanced, calm, and connected.
4. How to Layer Cues for Integration
Cueing is one of the most powerful tools for integration. The key is layering — starting simple and adding detail as clients are ready.
Layer 1: Awareness
“Notice your breath.”
“Feel your pelvis on the mat.”
Layer 2: Alignment
“Stack your ribs over your pelvis.”
“Widen your collarbones.”
Layer 3: Activation
“Gently engage your deep abdominals.”
“Feel your shoulder blades glide.”
Layer 4: Integration
“Let your breath support the movement.”
“Feel the connection from your centre to your limbs.”
Layering prevents overwhelm and builds understanding step by step.
5. Recognising When Integration Is Missing
Clients often show clear signs when they’re not integrating the essentials.
Common signs:
Holding the breath
Overusing superficial muscles
Losing alignment under load
Moving with tension or rigidity
Rushing through transitions
Compensating with the lower back or neck
How to correct it
Slow the movement down
Reduce load or range
Return to foundational cues
Re‑establish breath
Offer tactile feedback
Integration is a process, not a destination.
6. Teaching Integration Across Different Levels
Beginners
Focus on awareness and alignment
Use simple exercises
Keep cues clear and minimal
Intermediate clients
Add load and complexity
Introduce flow
Layer cues more deeply
Advanced clients
Challenge coordination
Use multi‑plane movement
Emphasise precision and control
Integration evolves as clients progress.
7. Integration for Mat Pilates
Mat Pilates offers unique opportunities for integration. It
Requires intrinsic stability
Encourages body awareness
Highlights compensations
Provides feedback for the client
Using props deepens integration.
8. Why Integration Is the Future of Pilates Teaching
Clients today want more than a workout — they want to feel better, move better, and understand their bodies and minds. Integration delivers that.
When you teach integration, clients:
Progress faster
Build balanced strength
Reduce pain
Improve posture
Develop confidence
Feel empowered
And your teaching becomes:
More intentional
More effective
More intuitive
More transformative
Integration is where Pilates becomes a lifelong practice.
Conclusion: Integration Is the Essence of Pilates
Integration is the culmination of everything we’ve explored in this series — breath, alignment, mobility, stability, core engagement, the principles, and the mind–body connection. When these elements come together, Pilates becomes a powerful, intelligent, and deeply embodied movement system.
Discover the 8 Pilates principles that create intelligent, embodied, and sustainable movement. Learn how relaxation, breath, alignment, concentration, co‑ordination, precision, flow, and stamina form the foundation of a mindful Pilates practice.
Pilates Essentials – Part 9:
Pilates is often described as a mind–body practice, but what truly gives it depth and transformative power are the principles that underpin every movement. These principles guide how we breathe, how we organise the body, how we focus, and how we move with clarity and ease.
In classical Pilates, six principles are commonly taught. But over decades of teaching, studying biomechanics, and working with hundreds of real bodies, I’ve found that a more somatic, contemporary approach serves people far better. The body responds differently when we consider the nervous system, breath mechanics, functional alignment, and the lived experience of each person.
So in this part of the Pilates Essentials Series, I’m sharing my eight Pilates principles — the ones I use in every class, every workshop, and every teacher‑training programme. They honour the classical method, but they also reflect the way modern bodies move, learn, and heal.
These principles are the foundation of everything I teach, from Micro‑Somatics to senior fitness, from holistic back care to postural assessment. They create a practice that is accessible, intelligent, and deeply embodied.
Let’s explore them in depth.
1. Relaxation: The Gateway to Somatic Awareness
Relaxation is the first principle because without it, nothing else can land. It’s not about collapsing or switching off — it’s about releasing unnecessary tension so the body can organise itself more efficiently and we can feel grounded.
When we soften, the nervous system shifts out of “doing” mode and into a state where learning, sensing, and refining become possible. This is where mind–body connection begins.
Why it matters:
Reduces gripping and compensatory patterns
Improves breath quality
Creates space for natural alignment
Enhances proprioception and interoception
Try this: Lie down and let the floor support you. Notice where you’re holding tension — jaw, shoulders, belly — and soften by. This tiny shift changes everything.
2. Breath: The Anchor of Movement and Core Support
Breath is the bridge between the somatic and the structural. We begin with diaphragmatic breathing to restore natural core activation, then progress to thoracic/lateral breathing to support movement without bracing or gripping.
Breath influences the spine, the pelvic floor, the deep core, and the nervous system. It sets the rhythm and quality of every exercise.
Why it matters:
Supports natural core activation
Reduces neck and shoulder tension
Improves rib mobility
Enhances flow and stamina
Try this: Place your hands on your lower ribs. Inhale and feel them widen; exhale and feel them soften. Let breath initiate movement rather than follow it.
3. Alignment & Centring: Organising the Body for Ease and Efficiency
Alignment is not about “perfect posture.” It’s about organising the body so movement becomes efficient, supported, and pain‑free. Centring is the integration of breath, deep core, and spinal awareness.
This principle is especially important for modern bodies — bodies that sit, drive, scroll, and carry stress. When we realign, we create space for movement to feel lighter and more sustainable.
Why it matters:
Reduces strain on joints
Improves balance and stability
Enhances core integration
Supports long‑term spinal health
Try this: Find a neutral pelvis and spine as a starting point, not a rule. Notice where your weight naturally sits — front/back, left/right — and gently rebalance.
4. Concentration: The Mindful Heart of Pilates
Pilates is mindful movement. Concentration brings presence, clarity, and refinement. It transforms an exercise from something you do into something you experience.
When attention is focused, the nervous system learns faster, the body moves more efficiently, and the practice becomes meditative.
Why it matters:
Improves movement quality
Enhances body awareness
Reduces risk of injury
Deepens the mind–body connection
Try this: Choose one intention per exercise — breath, alignment, or a specific sensation — and stay with it throughout the movement.
5. Co‑ordination: Integrating Breath, Body, and Intention
Co‑ordination is the harmonious relationship between breath, body, and intention. It’s where somatic awareness meets functional movement.
This principle helps us move as an integrated whole rather than in isolated parts. It’s essential for balance, gait, and everyday movement patterns.
Why it matters:
Improves timing and rhythm
Enhances functional movement
Supports flow and stamina
Builds confidence and ease
Try this: Match breath to movement. Notice how the upper and lower body communicate — or don’t — and refine from there.
6. Precision: Clarity Over Perfection
Precision is clarity, not perfectionism. It’s about choosing the most efficient pathway for the body in each moment.
Small adjustments create big changes. Precision builds skill, confidence, and body intelligence.
Why it matters:
Improves movement efficiency
Reduces compensations
Enhances strength and control
Supports long‑term progress
Try this: Slow down. Feel the pathway of the movement rather than rushing to the end point.
7. Flow: Movement as Meditation
Flow is the continuity of movement, breath, and attention. It turns Pilates into a moving meditation.
Flow doesn’t mean rushing — it means moving with rhythm, ease, and intention. It’s the principle that brings grace and pleasure into the practice.
Why it matters:
Builds stamina and resilience
Enhances breath–movement integration
Improves transitions and sequencing
Creates a sense of ease and enjoyment
Try this: Focus on smooth transitions and consistent breath. Let one movement lead naturally into the next.
8. Stamina: Sustaining Quality Through Challenge
Stamina is the culmination of all the principles working together. It’s not just physical endurance — it’s the ability to maintain awareness, alignment, and breath as movement becomes more demanding.
This principle builds resilience, confidence, and long‑term strength.
Why it matters:
Supports progression
Builds physical and mental resilience
Enhances functional strength
Encourages consistency and commitment
Try this: Layer complexity gradually. Keep the quality of movement high, even as intensity increases.
Why These Principles Matter for Your Practice
These eight principles create a framework that is:
somatic and nervous‑system aware
accessible for all bodies
grounded in functional movement
supportive for rehabilitation and prevention
deeply aligned with a contemporary approach to Classical Pilates
What’s Next in the Essentials Series
In Part 10, we’ll bring everything together — helping you understand how these principles, foundations, and practices integrate into a sustainable, intelligent Pilates routine.
Snapping Hip Syndrome (SHS) is one of those curious movement phenomena that clients often describe as “a click,” “a pop,” or “a flick” at the front, side, or back of the hip. Sometimes it’s painless; sometimes it’s sharp and uncomfortable. For Pilates teachers and movement practitioners, understanding the underlying causes is essential—not only for supporting clients safely, but also for refining our own movement practice.
In this post, we’ll explore the key contributors to SHS—muscle and tendon tightness, anatomical variations, overuse and fatigue, and intra‑articular causes—and why maintaining neutral alignment, activating the core, and reducing range of motion can make such a profound difference.
What Is Snapping Hip Syndrome?
Snapping Hip Syndrome occurs when a structure around the hip—usually a tendon—moves over a bony prominence, creating an audible or palpable “snap.” It can happen:
Externally (most common): the IT band or gluteus maximus tendon flicks over the greater trochanter.
Internally: the iliopsoas tendon snaps over the femoral head or iliopectineal eminence.
Intra‑articularly: the “snap” originates from within the joint, often due to a labral tear or loose body.
For Pilates teachers, the snapping often appears during leg circles, hip flexion work, side‑lying series, or any movement that challenges hip stability.
1. Muscle & Tendon Tightness: When Tension Creates Noise
Tightness in the hip flexors, TFL/IT band, or deep rotators can increase friction around the hip. When a tendon is already taut, it’s more likely to “flick” over bone during movement.
Pilates takeaway: Lengthening strategies alone aren’t enough. We need to pair mobility with stability—especially around the pelvis and deep core—to reduce the tension‑plus‑instability combination that often triggers snapping.
Anatomical Variations: When Structure Shapes Function
Some people are simply more predisposed to SHS due to their natural anatomy. Variations in:
Femoral neck angle
Acetabular depth
Trochanteric width
Tendon pathing
…can all influence whether a tendon is more likely to catch.
This is why two clients can perform the same movement with identical technique, yet only one experiences snapping.
Pilates takeaway: Alignment needs to supports our body and movement. Our job is to help clients find their most functional position, not force them into shapes that don’t suit their structure.
3. Overuse & Fatigue: When the System Can’t Support the Load
Repetitive hip flexion (running, cycling, dance, high‑volume Pilates) can fatigue stabilising muscles. When the deep stabilisers switch off, the larger global muscles take over—and they’re not designed for fine control.
This leads to:
Loss of pelvic stability
Increased tendon friction
Reduced neuromuscular control
Compensatory gripping patterns
Pilates takeaway: Less is often more. Reducing range, slowing tempo, and reinforcing core‑to‑limb sequencing helps restore control and reduce snapping.
4. Intra‑Articular Causes: When the Issue Is Inside the Joint
Although less common, snapping can originate from within the hip joint itself. Causes may include:
Labral tears
Cartilage irregularities
Loose bodies
These often present with deeper pain, catching, or giving way.
Pilates takeaway: If snapping is painful, unpredictable, or accompanied by joint instability, refer to a medical professional or appropriate therapist. Pilates can support, but it shouldn’t replace medical assessment.
Why Neutral Alignment Matters
Neutral pelvis and spine create the most efficient environment for the hip to move without unnecessary friction. When the pelvis tips forward or backward, the path of the tendons changes—and snapping becomes more likely.
Neutral alignment helps:
Balance the hip flexors and extensors
Reduce anterior hip compression
Improve load transfer through the pelvis
Support optimal tendon tracking
Core Activation: The Stability That Protects the Hip
When the deep core (TA, pelvic floor, multifidus, diaphragm) is active, the pelvis becomes a stable base for the femur to move from. Without this stability, the hip flexors often overwork to create control, increasing the likelihood of snapping.
Core activation helps:
Reduce excessive hip flexor recruitment
Improve femoral glide
Support smoother tendon movement
Enhance proprioception and control
Think of it as giving the hip a “quiet environment” to move in.
Reducing Range of Motion: A Smart, Not Weak, Strategy
Many clients push into end‑range hip movements long before they have the stability to support them. This is where snapping often appears.
By reducing range, we allow:
Better control
More accurate muscle recruitment
Less tendon displacement
Improved movement quality
Small, precise ranges build the neuromuscular foundation that eventually allows for larger, smoother, pain‑free movement.
Practical Teaching Tips for Pilates Teachers
Here are simple cues and strategies you can use immediately:
✔️ 1. Start with alignment
“Find your neutral—front and back of the pelvis equally weighted.”
✔️ 2. Layer in core activation
“Imagine zipping up from the pelvic floor to the ribs.”
✔️ 3. Reduce range
“Work in the range where the movement feels smooth and quiet.”
✔️ 4. Add a Prop
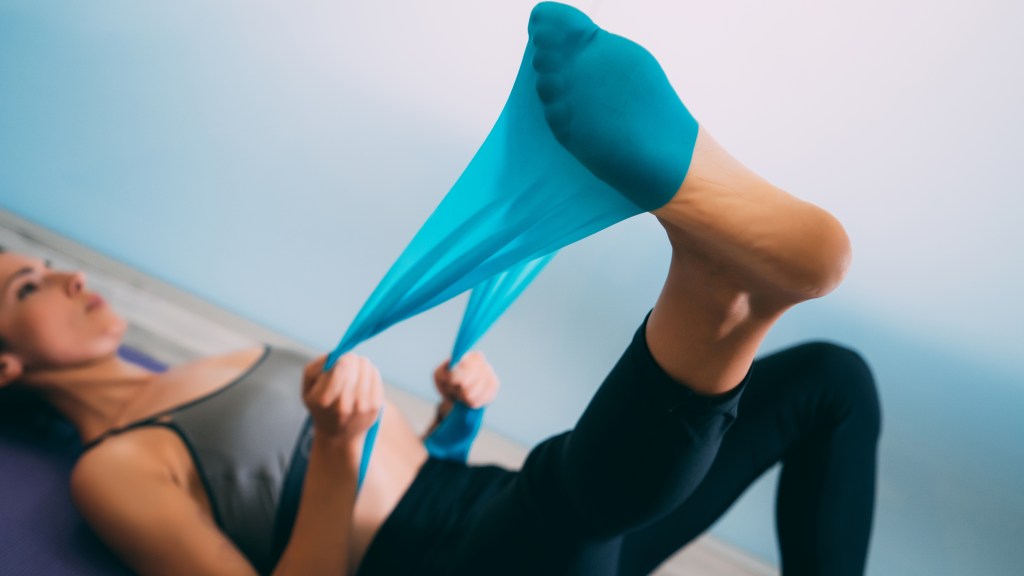
A resistance band will support the weight of the leg to help the core.
Snapping Hip Syndrome is rarely something to fear—but it is something to understand. With thoughtful cueing, intelligent range management, and a focus on neutral alignment and core stability, we can help clients move with more ease, less noise, and far greater confidence.
Introduction: The Mind–Body Connection Is the Heart of Pilates
Pilates isn’t simply about strengthening muscles, the core or improving flexibility — it’s about cultivating awareness, presence, and intentional movement. For teachers, helping clients develop this connection is one of the most transformative aspects of the work.
Yet many clients arrive in the studio disconnected from their bodies. They’re stressed, distracted, rushing, or simply unaware of how they move. Teaching the mind–body connection is not about making Pilates “spiritual” — it’s about helping clients feel, sense, and understand their bodies so they can move with clarity and control.
In this instalment of the Pilates Essentials Series, we explore how to teach the mind–body connection in a practical, accessible, and empowering way — so your clients can experience Pilates not just as exercise, but as embodied practice.
1. What the Mind–Body Connection Really Means in Pilates
The mind–body connection is often misunderstood as something abstract or mystical. In Pilates, it’s incredibly practical.
It means:
Being aware of how the body moves
Noticing compensations and patterns
Feeling the difference between effort and strain
Using breath to support movement
Staying mentally present
Moving with intention rather than habit
Why it matters
Clients who develop mind–body awareness:
Progress faster
Move more efficiently
Experience fewer injuries
Build deeper core strength
Feel more confident in their bodies
For teachers, it’s the difference between clients “doing exercises” and clients learning to move.
2. The Neuroscience of Awareness: Why Pilates Works
Pilates enhances proprioception — the body’s ability to sense its position in space. This is essential for balance, coordination, and movement efficiency.
Neuromuscular coordination — the brain–muscle connection
When clients focus their attention, the brain literally rewires itself. This is why Pilates can feel so grounding, calming, and empowering.
3. Teaching Clients to “Feel” Instead of “Force”
Many clients approach movement with a “push harder” or “feel the burn” mentality. Pilates invites them to shift from force to awareness.
How to teach this shift
Encourage curiosity rather than performance
Use slow, controlled movement
Offer moments of stillness
Ask reflective questions
Use breath to reduce tension
Teacher cue examples
“Notice what you feel, without expectation.”
“Let the movement be guided by awareness, not effort.”
This shift is often life‑changing for clients.
4. The Role of Breath in the Mind–Body Connection
Breath is the anchor of awareness. It regulates the nervous system, supports the core, and helps clients stay present.
Why breath matters
Reduces stress
Enhances focus
Improves ribcage mobility
Supports deep core activation
Creates rhythm and flow
How to teach breath as awareness
Begin sessions with simple breathing
Use breath to guide transitions
Encourage natural, unforced breath
Connect breath to movement intention
Teacher cue examples
“Let your breath bring you into your body.”
“Inhale to create space; exhale to support.”
Breath is the simplest and most powerful tool for presence.
5. Cueing for Awareness: How to Help Clients Tune In
Cueing is one of the most effective ways to build the mind–body connection.
Use sensory cues
“Feel your ribs expand into your hands.”
“Notice the weight under your feet.”
Use directional cues
“Let your spine lengthen upward.”
“Allow your shoulder blades to glide.”
Use reflective cues
“What changed when you softened your breath?”
“Can you sense your pelvis staying steady?”
Use imagery
“Imagine your spine floating.”
“Think of your breath as a wave.”
Imagery bypasses overthinking and taps directly into sensation.
6. Creating a Mindful Teaching Environment
The environment you create as a teacher shapes your clients’ ability to connect.
Practical ways to support awareness
Reduce unnecessary talking
Allow pauses
Use consistent cueing language
Keep transitions smooth
Offer grounding moments at the start and end of class
Encourage internal focus
Rather than clients looking for external validation, guide them inward.
Cue:
“Notice what feels different today.”
“Let your body guide the movement.”
A mindful environment helps clients feel safe, supported, and present.
7. Exercises That Naturally Build the Mind–Body Connection
1. Pelvic tilts
Teach awareness of the spine and pelvis.
2. Supine breathing with tactile feedback
Enhances ribcage awareness and core activation.
3. Cat–cow variations
Connect breath and spinal mobility.
4. Footwork
Teaches alignment, grounding, and control.
5. Side‑lying leg series
Builds awareness of hip stability and movement patterns.
6. Standing balance work
Enhances proprioception and whole‑body integration.
These exercises encourage clients to feel, sense, and adjust.
8. Helping Clients Break Habitual Patterns
Many clients move from habit rather than awareness. Pilates helps them break these patterns.
Common patterns include:
Overusing the lower back
Gripping the hip flexors
Shrugging the shoulders
Holding the breath
Collapsing into the feet
How to help clients change patterns
Slow the movement down
Reduce load
Use tactile feedback
Offer clear, simple cues
Celebrate small improvements
Awareness is the first step toward change.
9. The Mind–Body Connection as a Teaching Philosophy
Teaching the mind–body connection is not a technique — it’s a philosophy.
It means teaching clients to:
Move with intention
Listen to their bodies
Respect their limits
Explore their potential
Stay present
Build confidence
It means teaching from a place of:
Curiosity
Compassion
Clarity
Patience
Precision
When you teach this way, your sessions become more than workouts — they become experiences.
10. Why the Mind–Body Connection Elevates Your Teaching
When clients develop awareness, everything improves:
Technique
Strength
Mobility
Balance
Breath
Confidence
And your teaching becomes:
More intuitive
More effective
More impactful
Clients feel seen, supported, and empowered — and they keep coming back because they feel the difference.
Conclusion: Awareness Is the Foundation of Transformation
The mind–body connection is the heart of Pilates. It’s what turns movement into practice, effort into ease, and exercise into transformation. As teachers, our role is to guide clients toward awareness — one breath, one cue, and one moment at a time.
When clients learn to move with presence and intention, they don’t just change their bodies — they change their relationship with themselves.
Introduction: Why Hip Mobility Is the Missing Link in Most Pilates Practices
If there is one area of the body that consistently shows up with tightness, weakness, compensation, or confusion in Pilates clients, it’s the hips. The hip joint is incredibly powerful and incredibly complex — and when it’s not moving well, the entire body feels the consequences.
For Pilates teachers, understanding hip mobility and lower‑body alignment is essential for helping clients move with ease, reduce pain, and build functional strength. The hips influence gait, posture, balance, core activation, and even breath. When the hips are stiff or misaligned, clients compensate with their lower back, knees, or feet without realising it.
In this instalment of the Pilates Essentials Series, we explore how to teach hip mobility and lower‑body alignment in a way that empowers your clients to move freely, safely, and efficiently.
1. Why Hip Mobility Matters in Pilates
The hip joint is a ball‑and‑socket joint designed for a wide range of motion. But modern life — sitting, driving, screens, stress — limits that movement dramatically.
Common hip issues you’ll see in clients:
Tight hip flexors
Weak glutes
Limited hip extension
Poor external rotation
Overactive TFL and quads
Knee valgus or varus
Lower‑back compensation
Why this matters in Pilates
Hip mobility affects:
Pelvic alignment
Core activation
Spinal mobility
Balance and gait
Lower‑body strength
Load distribution
When the hips move well, the entire body moves better.
2. Understanding Lower‑Body Alignment: A Teacher’s Perspective
Lower‑body alignment is not just about the hips — it’s about the entire kinetic chain.
Key alignment checkpoints:
Feet: tripod grounding, arches active
Knees: tracking over the second toe
Hips: level, stable, mobile
Pelvis: neutral, not tipping, tilting or rotating
Spine: supported by the core
The hips as the centre of lower‑body organisation
The hips influence:
Knee tracking
Foot mechanics
Pelvic stability
Glute activation
Balance and proprioception
When the hips are aligned, the rest of the lower body follows.
3. The Three Pillars of Hip Mobility
1. Flexibility
Clients need adequate length in:
Hip flexors
Hamstrings
Adductors
External rotators
2. Strength
Mobility without strength leads to instability. Key muscles include:
Glute max
Glute med/min
Deep hip rotators
Hamstrings
Iliopsoas
3. Control
True mobility is the ability to move through range with control. Pilates excels here.
4. How Hip Mobility Influences the Entire Body
a. The pelvis
Tight hip flexors pull the pelvis into anterior tilt. Weak glutes reduce pelvic stability. Both affect spinal alignment.
b. The spine
When the hips don’t move, the lower back compensates. This is a major cause of:
Lower‑back pain
Poor core activation
Limited spinal mobility
c. The knees
Hip weakness often shows up as:
Knee valgus (knees collapsing inward)
Knee varus (knees bowing outward)
d. The feet
Hip rotation influences foot pronation and supination.
5. Teaching Hip Mobility: A Step‑by‑Step Method for Instructors
Step 1: Build awareness
Clients must understand how their hips move.
Use explorations such as:
Leg and Hip circles
Leg slides
Standing weight shifts
External/internal rotation
Step 2: Introduce alignment
Cue:
“Keep your pelvis steady as your leg moves.”
“Imagine your thigh bone rotating inside your hip socket.”
“Let the movement come from the hip, not the back.”
Step 3: Layer in breath
Breath helps release tension and support stability.
Cue:
“Inhale to create space; exhale to stabilise.”
Step 4: Add load gradually
Once alignment is established, challenge it with:
Supine core work
Bridging variations
Side‑lying work
Standing balance
6. Common Hip Mobility Issues & How to Correct Them
This is where a deep knowledge of Pilates exercises, their purpose and benefits and anatomy and physiology are essential.
1. Tight hip flexors
Often caused by:
Sitting
Stress
Weak glutes
Corrections:
Stretch hip flexors
Strengthen glutes
Cue neutral pelvis
Shoulder Bridge with the extended leg variation will address all these issues, but there are many other exercises to choose from.
“Imagine your thigh bone spiralling in the socket” or “Stirring a cup of tea”
“Think of your hips as headlights — keep them shining forward.”
“Pelvis is a bowl of water – you don’t want to spill any.”
Use tactile cues
With consent:
Hands on the pelvis (yours or theirs)
Guiding hip rotation
Use functional cues
“Can you move your leg without your pelvis shifting?”
“Can you keep your knee tracking over your toes?”
Use layered cueing
Start broad → refine → integrate.
8. Exercises That Teach Hip Mobility Naturally
1. Supine leg circles
Teach hip dissociation.
2. Bridge variations
Strengthen glutes and improve hip extension.
3. Side‑lying leg series
Build lateral hip strength.
4. Clams and hip rotation drills
Improve external rotation.
5. Standing balance work
Integrate hip stability into functional movement.
9. Progressions for Safe, Effective Lower‑Body Training
Start with awareness
Clients must feel the hip joint move.
Add stability
Introduce neutral pelvis, core activation and knee tracking.
Add load
Leg lifts, bridging, standing work.
Add complexity
Rotation, balance, transitions.
Add functional integration
Gait patterns, footwork.
10. Why Hip Mobility Elevates Your Teaching
When you teach hip mobility well, your clients:
Reduce lower‑back pain
Improve posture
Strengthen their glutes
Move with more confidence
Build long‑term resilience
And your teaching becomes:
More precise
More effective
More transformative
Conclusion: Building Balanced, Functional Movement Patterns
Hip mobility and lower‑body alignment are essential for safe, efficient, and powerful movement. When clients learn to move their hips with awareness and control, they unlock better posture, stronger glutes, and a more integrated Pilates practice.
As teachers, our role is to guide them toward this freedom with clarity, patience, and thoughtful cueing.
It’s not enough to just know the Pilates exercises: we need to understand the purpose, benefits, muscles involved, fascia, the role of tension stored in body. A broad knowledge of all types of movement therapy is very useful. Take a look at my Services page, scroll through and click on the links for more information.
Introduction: Why the Shoulder Girdle Is the Unsung Hero of Pilates Technique
When we think of Pilates fundamentals, the core and pelvis often take centre stage — but the shoulder girdle is just as essential. For teachers, understanding how to cue and organise the shoulder complex is key to helping clients move with ease, reduce neck and upper‑back tension, and build true functional strength.
The shoulder girdle is a dynamic, mobile structure designed for fluid movement. Yet many clients arrive with stiff necks, rounded shoulders, overactive upper traps, and underactive stabilisers. Without proper alignment and engagement, even simple Pilates exercises can create strain instead of strength.
In this instalment of the Pilates Essentials Series, we explore how to teach shoulder girdle stability and upper‑body integration in a way that empowers your clients to move freely, breathe fully, and build balanced strength.
1. Understanding the Shoulder Girdle: A Teacher’s Guide
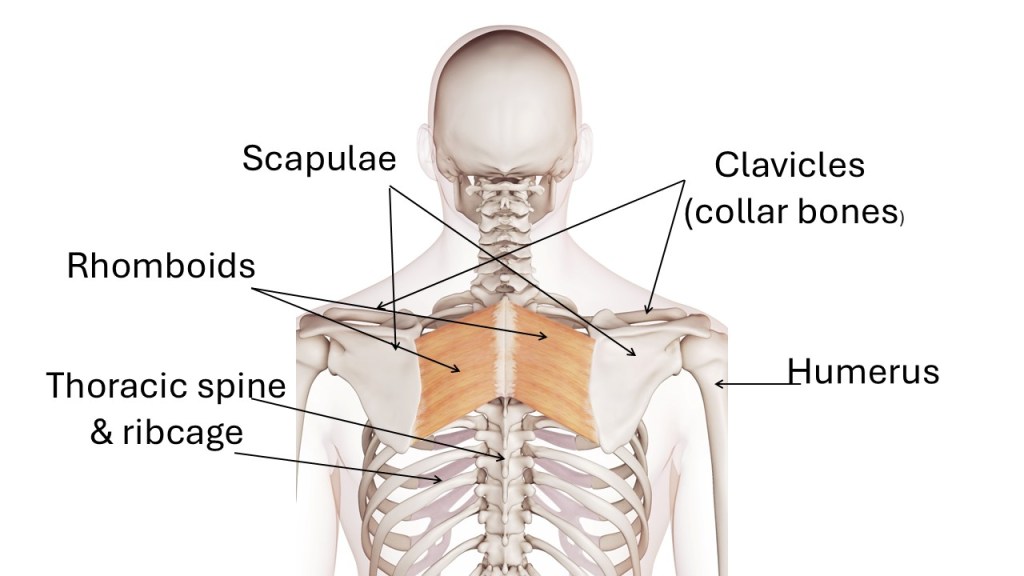
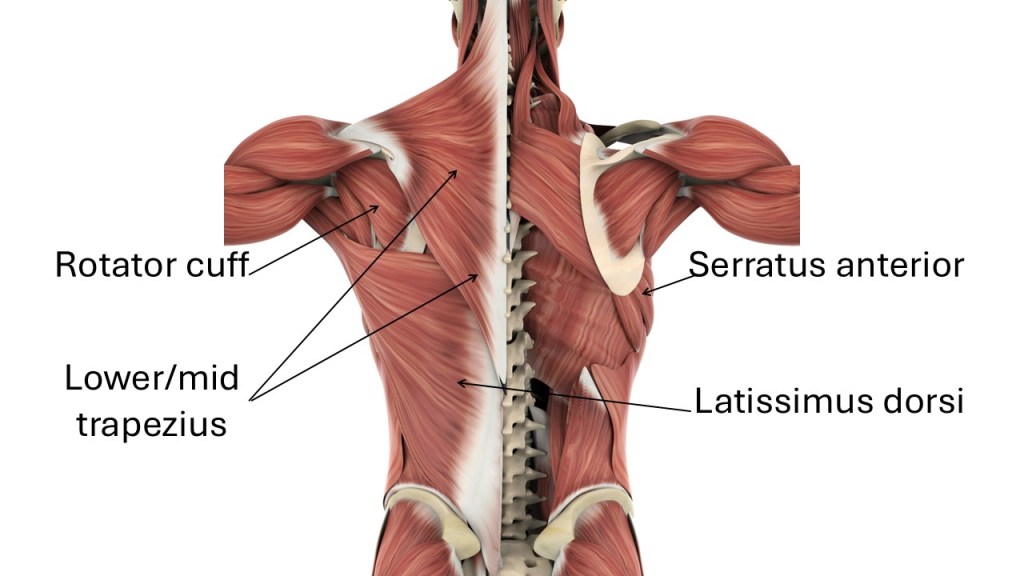
The shoulder girdle is not just the shoulder joint — it’s an entire system.
Key components include:
Scapulae (shoulder blades)
Clavicles (collarbones)
Humerus (upper arm bone)
Thoracic spine and ribcage
Muscles including:
Serratus anterior
Lower and middle trapezius
Rhomboids (above)
Rotator cuff
Pectorals (chest)
Latissimus dorsi
Why this matters in Pilates
The shoulder girdle influences:
Neck tension
Ribcage mobility
Breath capacity
Core activation
Arm strength
Posture
Load transfer through the spine
When the shoulder girdle is organised, the entire upper body becomes more efficient and responsive.
2. The Three Pillars of Shoulder Girdle Stability
1. Scapular placement
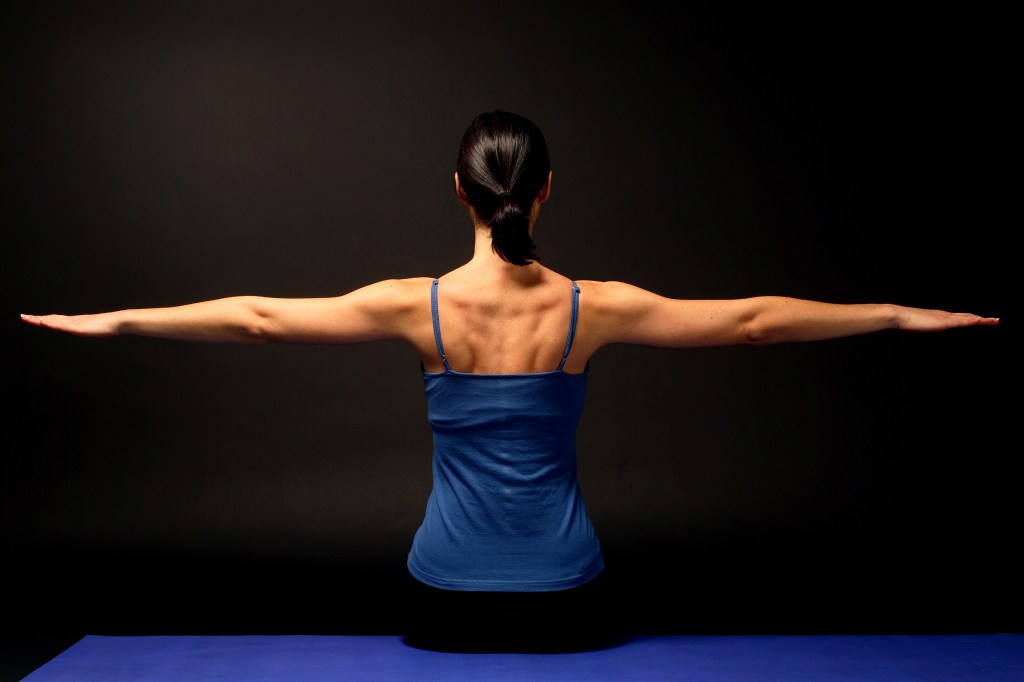
The scapulae should rest on the ribcage like “wings,” not pinched together or shrugged upward.
Neutral scapular placement means:
Wide across the collarbones
Shoulder blades gently anchored down the back
No gripping or forcing
2. Serratus anterior activation
This muscle is the secret weapon of shoulder stability.
It helps:
Keep the scapulae flush to the ribcage
Prevent winging
Support overhead movements
Reduce upper‑trap dominance
3. Balanced mobility
Stability does not mean rigidity. The shoulder girdle must glide, rotate, and slide to support natural movement.
3. How Shoulder Girdle Alignment Affects the Whole Body
a. The neck
Poor scapular control often leads to:
Neck tension
Forward-head posture
Overuse of upper trapezius
b. The ribcage
The shoulder girdle sits on the ribcage — if the ribs are stiff or flared, the shoulders cannot organise well.
c. The core
Upper‑body alignment influences:
Deep core activation
Breath mechanics and efficiency
Thoracic mobility
d. The arms
Without stable scapulae, arm movements become inefficient and strain the rotator cuff.
4. Teaching Shoulder Girdle Stability: A Step‑by‑Step Method for Instructors
Step 1: Build awareness
Clients must first feel their shoulder blades.
Use explorations such as:
Scapular elevation/depression
Protraction/retraction
Upward/downward rotation
Encourage slow, mindful movement.
Step 2: Introduce neutral scapular placement
Cue:
“Widen your collarbones.”
“Let your shoulder blades melt down your back.”
“Imagine your shoulder blades sliding into your back pockets.”
Avoid cues like “pull your shoulders down” — they often create tension.
Step 3: Layer in breath
Breath expands the ribcage, which supports scapular placement.
Cue:
“Inhale to widen the ribs; exhale to soften the shoulders.”
Step 4: Add load gradually
Once alignment is established, challenge it with:
Arm arcs
The Hundred arm pumps
Plank variations
The goal is maintaining organisation under increasing demand.
5. Common Shoulder Girdle Issues & How to Correct Them
“Imagine your shoulder blades floating on warm water.”
“Think of your collarbones as wings spreading wide.”
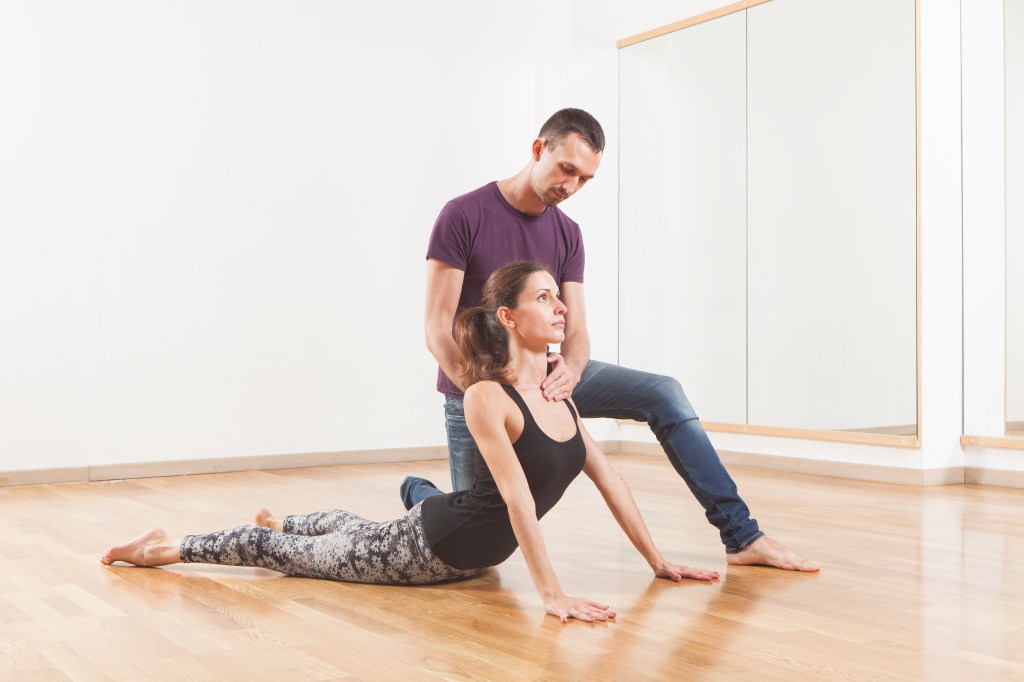
Use tactile cues
With consent:
Hands on the scapulae
Guiding the shoulder blades into neutral
Use functional cues
“Can you move your arm without your shoulder hiking?”
“Can you breathe without your shoulders lifting?”
Use layered cueing
Start broad → refine → integrate.
7. Exercises That Teach Shoulder Girdle Stability Naturally
1. Scapular isolations
Build awareness and control.
2. Angel Arms/Wall slides
Strengthen serratus anterior and improve upward rotation.
3. Quadruped arm reach
Integrates core, shoulder, and ribcage stability.
4. Plank variations
Teach load‑bearing with proper alignment.
5. Arm work
Challenges stability through resistance (bands or weights).
8. Progressions for Safe, Effective Upper‑Body Training
Start with awareness
Clients must understand scapular movement.
Add stability
Introduce neutral placement and breath.
Add load
Use arm arcs, resistance, and planks.
Add complexity
Rotation, balance, and dynamic transitions.
Add functional integration
Standing work, overhead movements, and full‑body sequences.
9. Why Shoulder Girdle Stability Elevates Your Teaching
When you teach shoulder girdle organisation well, your clients:
Reduce neck and shoulder tension
Improve posture
Strengthen their upper body safely
Move with more confidence
Breathe more fully
Build long‑term resilience
And your teaching becomes:
More precise
More effective
More transformative
Conclusion: Creating Strength Without Tension
The shoulder girdle is a dynamic, powerful system that supports every upper‑body movement in Pilates. When clients learn to organise their shoulders with ease and awareness, they unlock a new level of strength — one that is grounded, balanced, and free from tension.
As teachers, our role is to guide them toward this integration with clarity, patience, and thoughtful cueing.
Introduction: Why Pelvic Alignment Is the Quiet Powerhouse of Pilates
If there is one concept that quietly determines the success, safety, and effectiveness of nearly every Pilates exercise, it’s pelvic alignment. For teachers, understanding how to assess, cue, and correct pelvic positioning is essential — not only for technique, but for helping clients build long‑term functional strength, good posture and body awareness.
Pelvic alignment is the foundation of spinal organisation, core activation, hip mobility, and load distribution. When the pelvis is out of alignment, everything above and below it compensates. When it’s in neutral, the body moves with efficiency, stability and ease.
In this instalment of the Pilates Essentials Series, we explore how to teach pelvic alignment and neutral spine with clarity, confidence and precision — so your clients can move better, feel stronger and stay injury‑free.
1. Understanding Pelvic Alignment: The Teacher’s Perspective
Before we can teach pelvic alignment effectively, we need to understand what we’re looking for.
The pelvis has three primary positions:
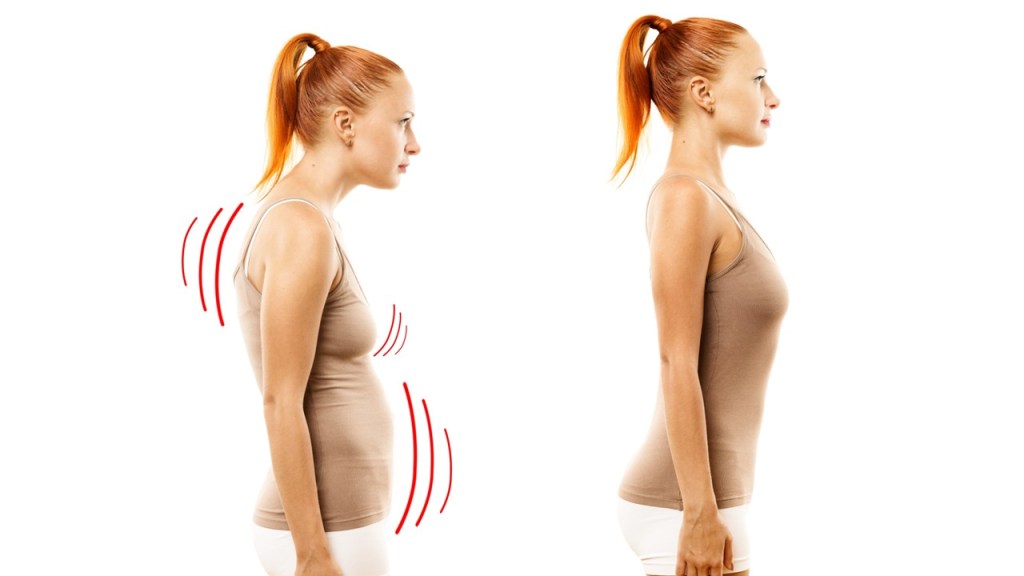
Anterior tilt — ASIS forward/down, lumbar spine increases in extension
Reduces compensatory tension in the hips and lower back
Improves load transfer through the kinetic chain
Enhances balance and proprioception
For teachers, neutral pelvis is a functional starting point. It’s the place where the body is most organised and ready for movement.
2. How Pelvic Alignment Influences the Entire Body
a. The spine
The pelvis is the base of the spine. If the base shifts, the spine must adapt.
Anterior tilt → increased lumbar lordosis
Posterior tilt → flattened lumbar curve
Neutral → natural shock absorption and segmental mobility
b. The core
Neutral pelvis allows the transversus abdominis, pelvic floor and multifidus to work together. If the pelvis is tilted, one or more of these systems becomes inhibited.
c. The hips
Hip flexors, extensors, abductors and rotators all attach to the pelvis. Pelvic misalignment often shows up as:
Tight hip flexors
Weak glutes
Limited hip extension
Overactive hamstrings
d. Movement quality
Clients with poor pelvic alignment often:
Grip with their lower back
Overuse superficial abdominals
Struggle with balance
Lose control during transitions
Teaching neutral pelvis early creates a foundation for everything that follows.
3. Teaching Neutral Spine: A Step‑by‑Step Approach for Instructors
Step 1: Establish body awareness
Clients need to feel the pelvis move before they can control it.
Use simple explorations:
Pelvic tilts (anterior/posterior)
Rocking side to side
Circling the pelvis
These movements help clients understand the range available to them.
Step 2: Define neutral clearly
Use tactile, visual and verbal cues:
“Imagine your pelvis is a bowl of water — in neutral, the water stays level.”
“Your hip bones and pubic bone form a triangle — keep it flat like a tabletop.”
“Feel equal weight on both sit bones.”
Step 3: Layer in breath
Breath helps release unnecessary tension and supports deep core activation.
Cue:
Inhale to expand the ribs laterally
Exhale to gently engage the deep abdominals without forcing a tilt
Step 4: Add load gradually
Once neutral is established, challenge it with:
Arm movements
Leg lifts
Bridging variations
Quadruped work
The goal is maintaining alignment under increasing demand.
4. Common Pelvic Alignment Issues & How to Correct Them
1. Over‑tucking (posterior tilt dominance)
Often seen in clients who:
Have tight hamstrings
Overuse superficial abdominals
Fear lumbar extension
Corrections:
Encourage length through the spine
Cue the sit bones to widen
Reduce abdominal bracing
Strengthen hip flexors and spinal extensors gently
2. Over‑arching (anterior tilt dominance)
Common in:
Can be seen in hypermobile clients
Those with tight hip flexors
People who stand with “gymnastic/dancer’s posture”
Corrections:
Cue drawing back the ribs
Encourage engagement of lower abdominals
Stretch hip flexors
Strengthen glutes and hamstrings
3. Lateral pelvic shift or hike
Often caused by:
Glute med weakness on one side
Scoliosis
Habitual standing patterns
Corrections:
Cue equal weight on both sit bones
Strengthen lateral hip stabilisers
Use mirrors or tactile feedback
5. Cueing Strategies That Actually Work
Use imagery
Pilates thrives on imagery because it bypasses overthinking.
“Imagine your pelvis is a compass — keep north and south aligned.”
“Think of your pelvis as a bowl of fruit — don’t spill it.”
Use tactile cues
Either client of you with consent:
Hands on ASIS
Hands on the sacrum
Guiding the pelvis through tilt and neutral
Use functional cues
“Can you breathe without your pelvis shifting?”
“Can you lift your leg without your back joining in?”
Use layered cueing
Start simple → add detail → refine precision.
6. Exercises That Teach Pelvic Alignment Naturally
1. Supine pelvic tilts
Build awareness and control.
2. Bridge extended leg variation
Teach hip extension without lumbar compensation.
3. Dead bug / toe taps
Challenge neutral under load.
4. Quadruped arm/leg reach (Box Swim/Superman)
Integrates core, pelvis and shoulder stability.
5. Standing weight shifts
Bring pelvic alignment into functional movement.
7. How to Progress Clients Safely
Start with awareness
Clients must feel the pelvis move.
Add stability
Introduce neutral and hold it with breath.
Add load
Leg lifts, arm reaches, bridging.
Add complexity
Rotation, balance, transitions.
Add functional integration
Standing work, balance, gait patterns.
8. Why Pelvic Alignment Is a Game‑Changer for Teachers
When you teach pelvic alignment well, you help clients:
Reduce back pain
Improve posture
Strengthen their core
Move with confidence
Understand their bodies
Build long‑term resilience
It also elevates your teaching:
Your cueing becomes clearer
Your programming becomes more intentional
Your clients progress faster
Your sessions become safer and more effective
Pelvic alignment is not just a concept — it’s a teaching superpower.
Conclusion: Neutral Pelvis as the Foundation for Everything That Comes Next
Pelvic alignment and neutral spine are the cornerstones of safe, effective Pilates practice. When clients understand how to organise their pelvis, they unlock better movement patterns, deeper core activation and a more connected mind‑body experience.
As teachers, our role is to guide them toward awareness, control and confidence — one cue, one breath and one movement at a time.
The core is the powerhouse of Pilates. In Pilates, core engagement isn’t just about having toned abs — it’s about creating stability, improving posture, and enabling efficient movement. When your core is active, every exercise becomes safer and more effective.
“A strong centre supports everything else.”
Benefits of a Strong Core
Improved Posture: A stable core supports spinal alignment and reduces strain on joints.
Enhanced Balance: Core strength helps maintain equilibrium during dynamic movements.
Injury Prevention: Proper engagement protects the lower back and hips.
Functional Strength: A strong core translates to better performance in everyday activities.
Understanding the Core in Pilates
When we talk about the “core” in Pilates, we mean more than just the rectus abdominis (the six-pack muscles). The Pilates core includes:
Transversus Abdominis (TA): The deepest abdominal layer, acting like a corset.
Multifidus: Small stabilising muscles along the spine.
Pelvic Floor: Supports the organs and works with the TA for stability.
Diaphragm: Integral for breath and core activation.
Obliques: Assist with rotation and lateral flexion.
This interconnected system creates a strong, supportive centre for movement.
How to Cue Core Engagement Effectively
Teaching core activation is an art. Here are practical cues to help clients find and maintain engagement:
1. Start with Breath
Breathwork is the gateway to core activation. Use lateral breathing:
Inhale: Expand the ribcage sideways and into the back.
Exhale: Draw the navel gently towards the spine, activating the TA without gripping.
Cue: “Imagine tightening a corset as you exhale.”
2. Visualisation Techniques
“Think of zipping up a pair of jeans.”
“Draw your hip bones together without moving them.”
3. Avoid Common Mistakes
Over-bracing: A common mistake is gripping too hard, creating tension.
Holding Breath: Keep breathing while engaging.
Pelvic Tilt Overload: Engagement should be subtle, not forced.
Exercises to Build Core Stability
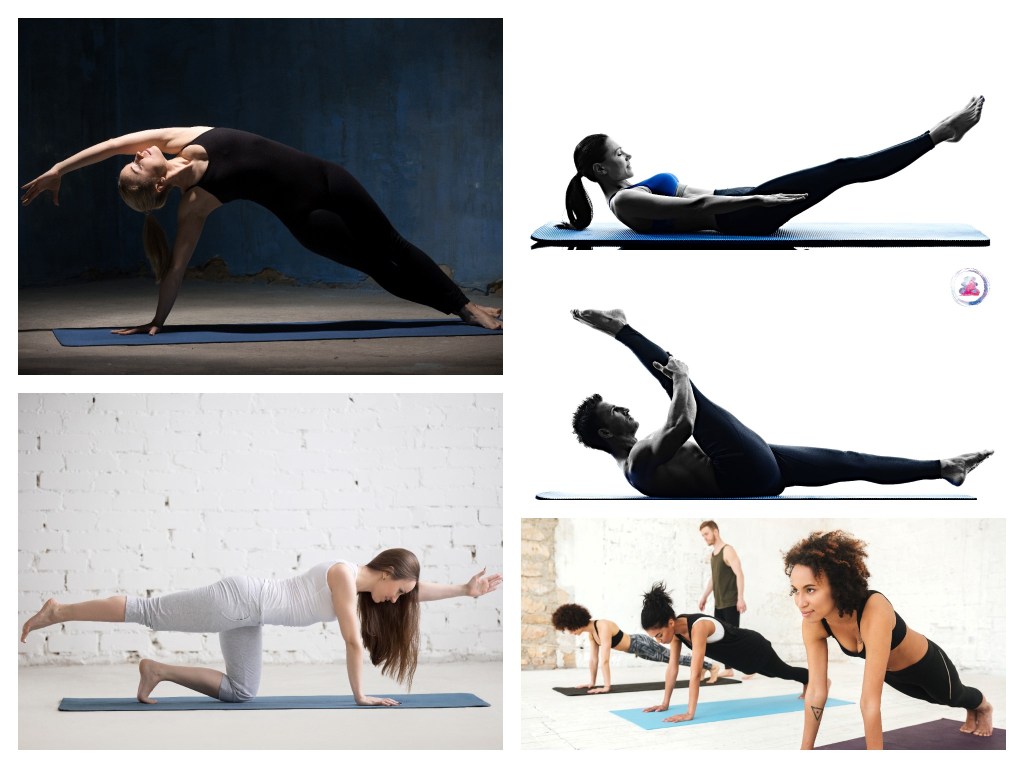
Here are five Pilates staples for core strength and stability:
1. The Hundred
Purpose: Warm-up and activate deep core muscles.
Key Cue: Maintain neutral spine while pumping arms.
Modification: Bend knees if needed.
2. Single Leg Stretch
Purpose: Strengthens TA and obliques.
Key Cue: Keep pelvis stable as legs move.
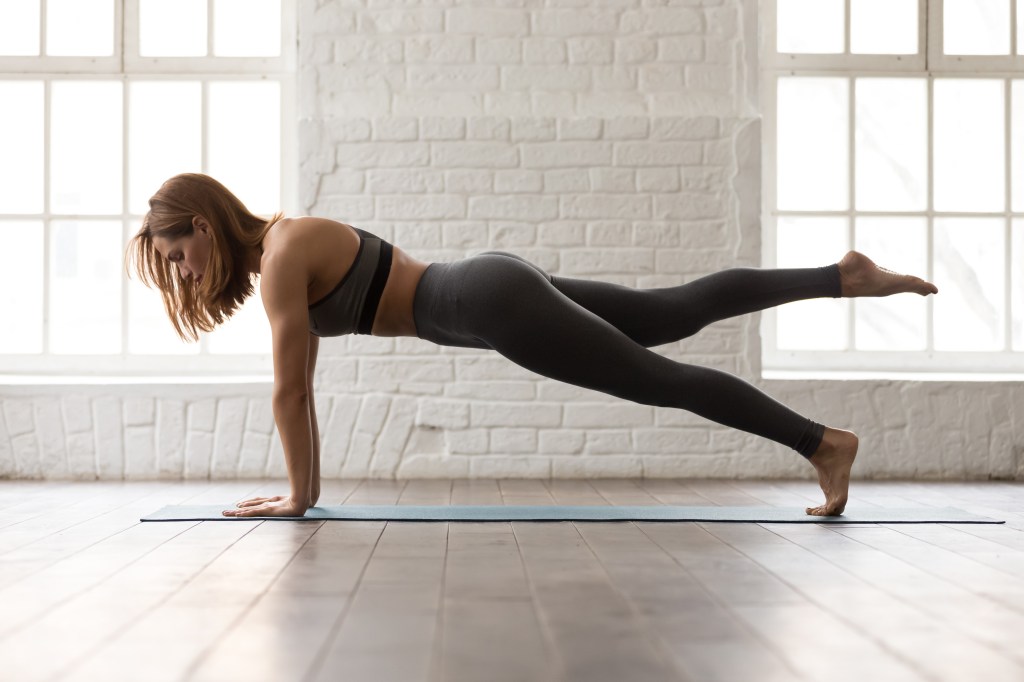
3. Plank/Leg Pull Down (modified)
Purpose: Full-body integration with core focus.
Key Cue: Avoid sagging hips; draw navel to spine.
4. Bird Dog
Purpose: Stability during limb movement whilst working multifidus.
Key Cue: Keep ribs connected and spine neutral.
5. Side Plank
Purpose: Targets obliques and lateral stability.
Key Cue: Lift from the core, lift out out the shoulder.
Take the Time to Connect
Whether you are teaching or practising Pilates, take the time to
Prepare the nervous system: breathe deeply, release tension from body & mind.
Find neutral position: the core muscles fire up most effectively in ideal alignment.
Feel the natural core activation with the exhale: this makes it easier to hold voluntarily as the mind has connected with the sensation.
Lateral/thoracic breathing: hold the contraction and feel the breath move into the ribcage, wide rather than deep.
Neuromuscular activation: warm up the core muscles and allow them to prepare for the work to come.
Integrating Core Engagement into Every Pilates Session
Core activation isn’t a standalone concept — it should underpin every exercise. Encourage clients (or yourself!) to:
Check-in before movement: Activate TA and pelvic floor. Breathe
Maintain engagement during transitions: Stability matters between exercises and before you start each exercise.
Release when appropriate: Avoid constant gripping; teach dynamic control. Consider at least a minute at the end of class in Savasana.
Want to deepen your understanding of Pilates fundamentals? Stay tuned for Part 5: Alignment and Posture: Key Principles for Safe and Effective Movement next week!
 BODY SOUL WELL