Category: Blog

  • Why Seniors Need Power, Not Just Balance

    Gentle strength work improves confidence, gait, and independence.

    Introduction

    These days, if you’re teaching daytime classes, they are likely to be full of seniors. When I first started teaching, this was definitely not the case: my 9.30am classes were full of mums who, having dropped the children off at school, would spend much of their mornings in fitness classes. Now, these classes are the luxury of those who can work flexitime or more commonly, those who have retired.

    When we think about exercise for older adults, we often jump straight to balance training. And yes — balance matters. But the latest research in ageing, fall prevention, and functional mobility shows something even more important: power.

    Not “gym power”. Not jumping or sprinting. But gentle, controlled, confidence‑building power — the ability to produce force quickly enough to stay safe, move well, and remain independent.

    This is where Pilates shines, not least because of the core strengthening opportunities and postural correction at it’s centre.

    What Is Power for Seniors?

    Power is simply strength + speed. It’s the ability to react, stabilise, and move with enough force and control to meet the demands of daily life.

    For seniors, power looks like:

    • Catching yourself if you trip
    • Smoothing rising from a chair
    • Climbing stairs without hesitation or reluctance
    • Turning quickly without losing balance
    • Lifting groceries with confidence

    These are not “fitness goals”. They are independence goals. The exercises we choose need to be functional.

    Why Power Declines Faster Than Strength

    As we age, we naturally lose muscle mass (sarcopenia). But what declines even faster is type II muscle fibre (fast twitch) recruitment — the fibres responsible for quick reactions and stabilisation.

    This means:

    • Balance training alone isn’t enough
    • Slow, gentle movement doesn’t fully prepare the body
    • Seniors need safe ways to practise responding and moving with intention

    Pilates offers this beautifully through controlled tempo changes, resistance, and mindful coordination.

    How Pilates Builds Power Safely

    Pilates is uniquely suited to senior power training because it emphasises:

    1. Controlled speed changes

    Slow → medium → slow This teaches the nervous system how to adapt. You can incorporate this in many ways, for example, you could take a Single Leg Stretch and play with the tempo, taking two repetitions slowly with the breath, then 4 reps double time.

    2. Whole‑body coordination

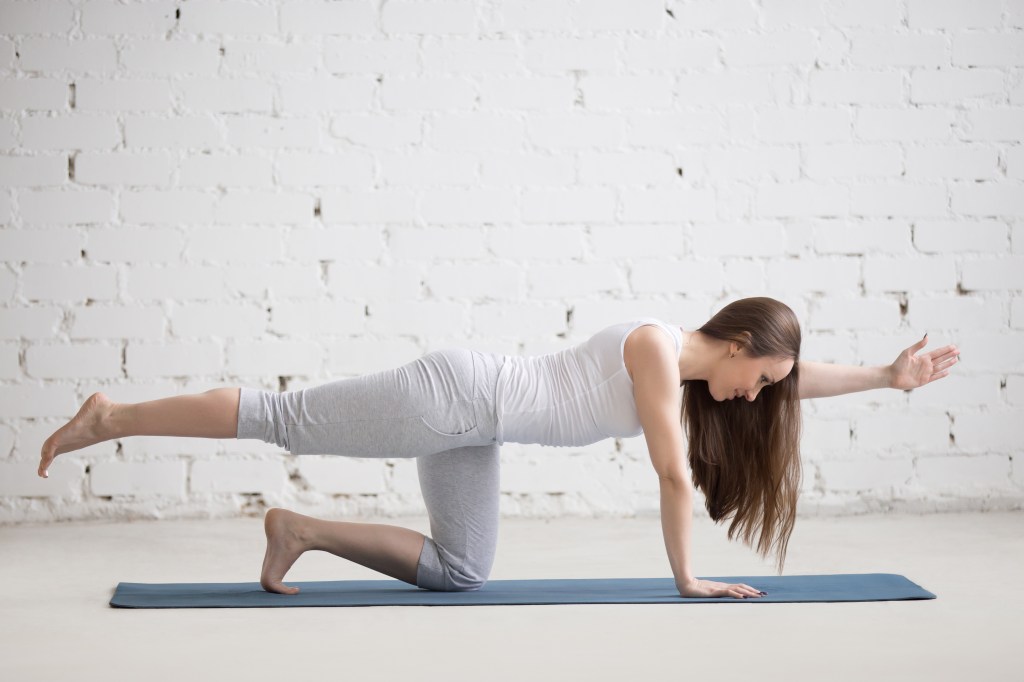
    Power isn’t just muscles — it’s timing, sequencing, and stability. Exercises like a full Shoulder Bridge or Dead Bugs are good examples of this.

    3. Resistance without strain

    Bands, light weights, and bodyweight create safe challenge. Adapting exercises to standing can offer resistance and balance, for example, lifting alternate knees to work the core and balance. Light hand weights will add further resistance and co-ordination challenges.

    4. Joint-friendly movement

    No impact. No jarring. Just intelligent loading.

    Three Power Drills for Seniors

    All Pilates exercises are excellent but you can also add the following exercises to further enhance your classes which are beneficial for all.

    These are simple, safe, and incredibly effective.

    1. Sit-to-Stand with Arm Reach

    Builds leg power, balance, and coordination.

    • Sit tall
    • Stand with a gentle push – this is your power move!
    • Reach arms forward as you rise
    • Lower with control – take twice as long for a tempo change

    Why it works: It mimics real-life movement and improves reaction time.

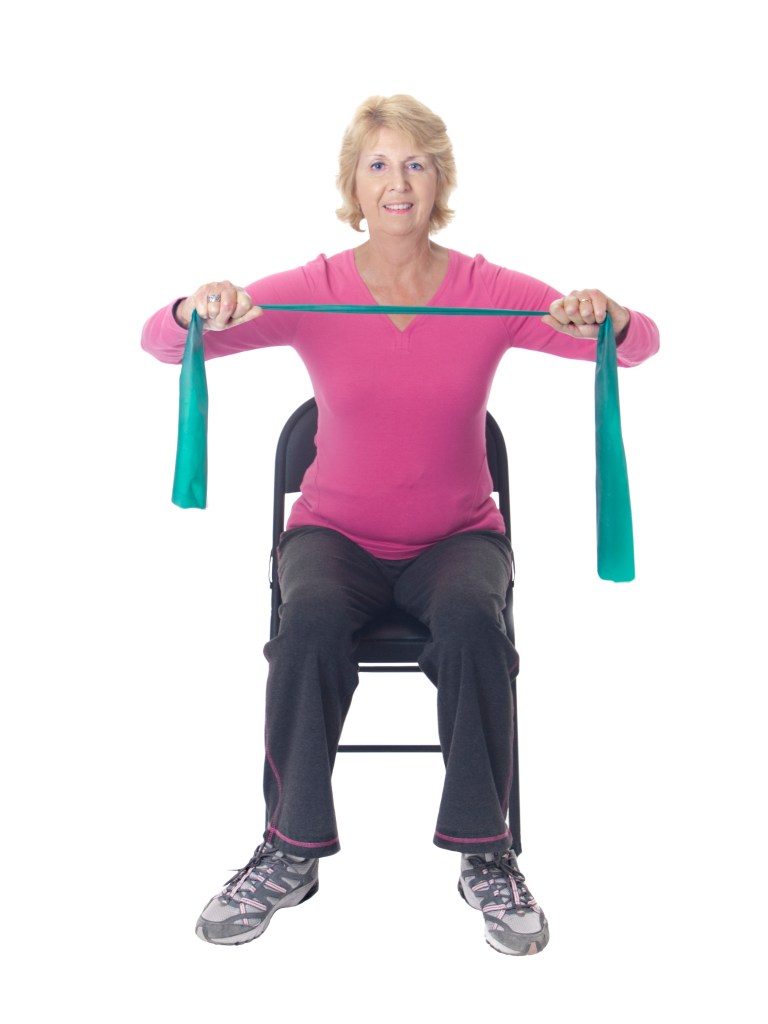
    2. Heel Press + Arm Pull (Resistance Band)

    Builds upper-body power and gait stability. You can choose any type of upper body exercise. You can also do this in a Shoulder Bridge position with the hips lifted and press down with the heels, lift the toes slightly.

    • Sit or stand tall
    • Press heels into the floor – this engages the glutes.
    • Pull the band back with intention
    • Release slowly

    Why it works: It trains the posterior chain — essential for posture and fall prevention. The upper work improves upper body posture.

    3. Step-Tap with Tempo Change

    Builds rhythm, timing, and confidence.

    • Step to the side or alternate knee lifts
    • Tap the floor or lift the knee
    • Change tempo: tap/lift → tap/lift → tap/lift/hold. Play with the speed

    Why it works: It challenges the nervous system safely and improves reaction time and balance.

    The Confidence Effect

    When seniors feel stronger and more responsive, everything changes:

    • They walk taller
    • They move more
    • They trust their bodies
    • They reduce fear of falling
    • They regain independence

    Power is not about being “athletic” or super fit. It’s about being capable.

    Conclusion

    If you teach seniors — or if you are a senior — start thinking beyond balance. Gentle power training is one of the most effective ways to improve mobility, confidence, and quality of life.

    Pilates offers the perfect environment to build it safely, mindfully, and joyfully, but add other exercises, too, that will help this older population maintain their independence long into their golden years.

  • The Pelvis as a Stress Container — Why It Holds Tension & How Somatic Movement Releases It

    The pelvis is often described as the body’s centre, but in somatic movement it is more than a landmark. It is a dynamic hub where structure, breath, visceral function, and nervous‑system tone meet and influence one another. When people say they “hold stress in their hips,” they’re pointing to something real: the pelvis is uniquely positioned to reflect both physical load and emotional load, and it responds to both with remarkable sensitivity.

    To understand why the pelvis becomes a stress container, we first need to appreciate its role as a convergence zone. Although both the musculoskeletal and autonomic nervous systems span the entire body, the pelvis is one of the few regions where they interact so densely. Structural support, visceral innervation, breath mechanics, and fascial pathways all intersect here. The diaphragm–pelvic floor relationship, the neural supply to the pelvic organs, and the connective‑tissue networks that pass through this area make the pelvis a natural meeting point of physical stability and stress‑response.

    The sacral plexus adds another layer to this interplay. Resting against the front of the sacrum, it carries motor and sensory fibres to the pelvic floor, deep hip rotators, and gluteal muscles, while its parasympathetic branches (S2–S4) help regulate bladder, bowel, and reproductive function. Because these nerves are influenced by autonomic state, shifts in stress, fear, or emotional load can directly affect pelvic muscle tone, breath responsiveness, and visceral tension. In simple terms, the pelvis is where your body’s physical support system meets its emotional and protective system — which is why tension so often gathers there.

    Many people experience this as:

    • A sense of gripping or bracing in the lower belly
    • Tightness in the hip flexors
    • A tucked or rigid pelvic position
    • Difficulty relaxing the glutes
    • A feeling of “holding on” in the centre of the body

    These patterns are not random. They are protective.

    When we understand this convergence, pelvic holding stops looking like a random pattern and starts looking like a meaningful strategy — a way the body creates stability, safety, and containment when life feels overwhelming. And this is precisely why somatic movement can be so transformative: it works with the nervous system, not against it, helping the pelvis soften, reorganise, and return to its natural rhythm.

    Why the Pelvis Holds Stress

    1. The Pelvic Floor Mirrors the Breath

    The diaphragm and pelvic floor work as a functional pair. When the diaphragm descends on inhalation, the pelvic floor responds by lengthening and yielding. When the diaphragm lifts on exhalation, the pelvic floor recoils and supports.

    If someone’s breathing becomes shallow — a common response to stress — the diaphragm stops moving through its full range. The pelvic floor follows suit, becoming less responsive and more rigid. Over time, this creates a baseline of tension that feels like “stress in the hips.”

    Research in respiratory biomechanics shows that reduced diaphragmatic excursion correlates with increased pelvic floor tone. In other words: when breath becomes tight, the pelvis becomes tight.

    2. The Pelvis Is Central to Postural Stability

    The pelvis is the keystone of the body’s alignment. Small shifts in pelvic position influence the lumbar spine, ribcage, hip joints, and even the feet. When the nervous system senses instability — physical or emotional — it often responds by stiffening the pelvis to create a sense of control.

    This can show up as:

    • Excessive posterior tilt (tucking)
    • Excessive anterior tilt (arching)
    • Reduced rotation during gait
    • Limited lateral shifting
    • Over‑recruitment of the hip flexors or glutes

    These patterns are not simply muscular habits: they are stabilisation strategies. The body is trying to feel safe.

    3. The Pelvis Stores Unresolved Protective Responses

    Somatic traditions such as Feldenkrais, Hanna Somatics, and trauma‑informed movement all recognise that the pelvis is a repository for incomplete reflexes — the “fight, flight, freeze, or fold” responses that were never fully expressed.

    For example:

    • A freeze response may create rigidity in the pelvic floor and hip rotators.
    • A flight response may tighten the hip flexors and shorten the front line of the body.
    • A fold response may collapse the lower belly and reduce pelvic mobility.

    These patterns can persist long after the triggering event has passed. The body remembers through tension.

    4. The Pelvis Is a Fascial Intersection

    The pelvis is wrapped in a dense network of fascia that connects to the thoracolumbar fascia, the adductors, the iliopsoas, the abdominal wall, and the diaphragm. The glutes are part of this system too. Gluteus maximus blends into the thoracolumbar fascia and sacrotuberous ligament, linking it directly to the pelvic floor, sacrum, and hamstrings. Gluteus medius and minimus sit within the lateral hip fascia, influencing pelvic stability and the way load transfers through the hips during walking and standing.

    Fascia responds to stress by thickening, dehydrating, and losing glide. When this happens, movement becomes restricted and the pelvis feels “stuck.”

    How Somatic Movement Releases Pelvic Tension

    Somatic movement works not by stretching tight muscles, but by restoring the body’s ability to sense, respond, and reorganise. It is a process of re‑education — teaching the nervous system that it is safe to soften.

    Here are the key mechanisms through which somatic movement helps the pelvis release stress:

    1. Releasing Protective Patterns Through Awareness

    Somatic movement begins with noticing. When someone becomes aware of how they hold their pelvis — how they grip, tuck, brace, or collapse — the nervous system gains new information. Awareness alone can reduce unnecessary tension.

    This is why slow, exploratory movements are so effective. They give the brain time to update its map of the pelvis.

    2. Restoring the Breath–Pelvis Relationship

    Gentle somatic practices that synchronise breath with pelvic movement help re‑establish the diaphragm–pelvic floor partnership. When breath becomes fluid, the pelvic floor becomes responsive again.

    Simple explorations such as:

    • Feeling the pelvic floor yield on inhalation
    • Allowing the lower belly to soften
    • Noticing the natural recoil on exhalation

    …can create profound shifts in pelvic tension.

    3. Re‑educating the Deep Stabilisers

    The deep stabilisers — pelvic floor, transversus abdominis, multifidus — are designed for subtle, continuous support. When they become overactive, they lose their ability to modulate.

    Somatic movement helps these muscles return to their natural rhythm by:

    • Reducing global bracing
    • Encouraging micro‑movements
    • Improving proprioception
    • Allowing the pelvis to tilt, rotate, and shift without fear

    As the stabilisers regain nuance, the pelvis feels lighter and more adaptable.

    4. Releasing Fascial Holding Patterns

    Slow, spiralling movements, gentle rocking, and mindful weight‑shifting hydrate the fascia and restore glide. When fascia becomes more elastic, the pelvis moves more freely and tension dissipates.

    This is why somatic movement often feels like “melting” or “unwinding.” The tissues are literally reorganising.

    5. Completing Unfinished Reflexes

    Somatic practices that allow the body to express small, instinctive movements — such as curling, uncurling, reaching, or shifting — help complete protective responses that were previously interrupted.

    When these reflexes resolve, the pelvis no longer needs to hold tension as a form of protection.

    What Pelvic Release Feels Like

    People often describe pelvic release as:

    • A sense of warmth or spreading
    • Softening in the lower belly
    • More freedom in the hips
    • Easier breathing
    • A feeling of being grounded but not heavy
    • A sense of emotional clarity or relief

    These sensations are signs that the nervous system is shifting from protection to presence.

    The Pelvis as a Gateway to Whole‑Body Ease

    When the pelvis releases tension, the effects ripple upward and downward through the kinetic chain. The lumbar spine decompresses. The ribcage becomes more buoyant. The hip joints regain mobility. The feet feel more connected to the ground.

    Emotionally, people often feel calmer, clearer, and more centred. The pelvis is not just a physical structure: it’s a gateway to embodied resilience.

    Somatic movement doesn’t force the pelvis to change. It invites it. And when the pelvis feels safe enough to soften, the whole body follows.

  • POSTURE IN MOTION: WHY DYNAMIC ALIGNMENT MATTERS MORE THAN STATIC SHAPES

    Such a simple exercise, yet few perform it well. Look out for shoulder position, rotation, leg extension and spinal alignment.

    Decoding Posture: Post 6

    Most people think of posture as a position you “hold”, but as movement professionals we know better. We spend much of our time observing our clients whilst they perform the exercises which reveals a great deal! Posture is not a statue — it’s a behaviour, a constantly adapting strategy created by the nervous system to keep the body upright, efficient, and safe.

    Static posture gives us useful information, but it only tells part of the story. If we want to understand a client’s true alignment, load strategies, and compensations, we must look at posture in motion.

    This is where real postural correction begins.

    Why Static Posture Isn’t Enough

    A client may appear symmetrical in standing, yet show clear asymmetries the moment they begin to move. This is because static posture reflects habit and a certain amount of knowledge of how it should be, but dynamic posture reflects function.

    When we assess movement, we see:

    • how the joints organise under load
    • how the myofascial system distributes tension
    • how the nervous system chooses stability
    • where compensations appear when the body is challenged

    This is the information that matters for effective, long‑term posture correction.

    Dynamic Posture Reveals the Truth

    During movement, the body can no longer “pose”. It must organise itself honestly.

    Common dynamic patterns you’ll see in clients include:

    • A pelvis that shifts or drops during gait (glute medius weakness, lateral chain imbalance)
    • A ribcage that rotates more to one side (thoracic mobility asymmetry, dominant oblique patterning)
    • A knee that collapses only during load (valgus strategy, foot pronation, hip instability)
    • A foot that stiffens during push‑off (reduced ankle mobility, over‑reliance on global stabilisers)

    These patterns don’t always appear in stillness — they emerge when the body must coordinate, stabilise, and transfer force.

    This is why dynamic assessment is essential for Pilates teachers, yoga teachers, and movement professionals working with posture correction.

    What Dynamic Posture Tells Us (Biomechanically)

    When you observe posture in motion, you gain insight into:

    1. Joint Stacking Under Load

    How the ankle, knee, hip, pelvis, ribcage, and head align when the body is moving — not just standing.

    2. Myofascial Continuity

    Where tension travels, which lines dominate, and which lines under‑perform (e.g., superficial front line vs deep front line).

    3. Neuromuscular Control

    How well the client can stabilise, decelerate, and coordinate movement.

    4. Breath + Posture Interaction

    Breathing patterns that collapse the ribcage, flare the ribs, or stiffen the diaphragm.

    5. Habitual Motor Patterns

    The “autopilot” strategies the nervous system uses to feel safe and efficient.

    This is the level of detail that allows us to create targeted, intelligent corrective exercise using matwork and simple props.

    Your Posture Story: A Useful Reflection (But With Purpose)

    While posture is influenced by history, emotion, environment, and experience, our goal as educators is not simply to observe — it’s to guide change.

    A reflective, somatic approach helps clients understand their patterns, but it also helps us direct them toward better alignment.

    Useful questions to explore with clients:

    • Where do you feel supported when you move?
    • Where do you feel effort or gripping?
    • What changes when you breathe differently?
    • What shifts when you slow down or reduce load?

    These reflections give clients agency, but they also give you diagnostic clues.

    Posture Correction Without Fear or Perfectionism

    Although most of us are far from the idea of “ideal posture”, there are more efficient, less stressful ways for the body to organise itself without feeling we have to strive for perfection.

    Posture correction isn’t about forcing a shape — it’s about:

    • improving joint alignment
    • restoring balanced muscle recruitment
    • increasing mobility where needed
    • building stability where lacking
    • retraining movement patterns
    • supporting the nervous system to adopt new strategies

    This is the heart of modern, science‑based postural work.

    How to Teach Dynamic Posture Assessment (Mat‑Based)

    You don’t need reformers or large apparatus to assess or correct posture. Matwork and simple props give you everything you need.

    Effective dynamic assessments include:

    • Gait observation (frontal + sagittal views)
    • Sit‑to‑stand (hip strategy, knee tracking, spinal sequencing)
    • Overhead reach (ribcage control, scapular mechanics)
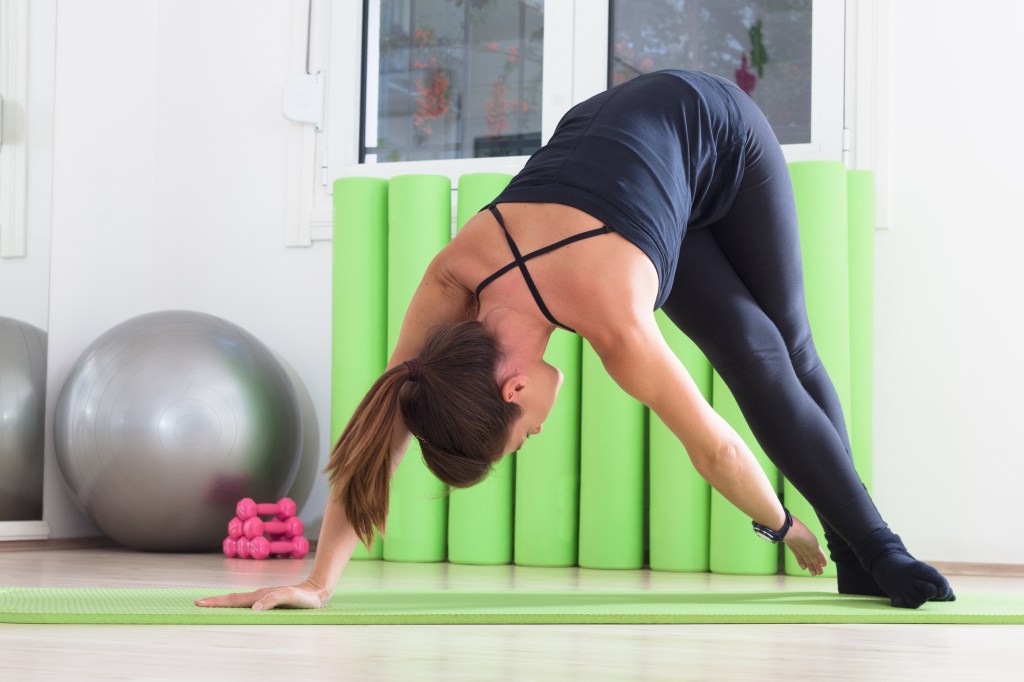
    • Forward fold + return (lumbar‑pelvic rhythm)
    • Single‑leg balance (hip stability, foot mechanics)
    • Cat/Cow (spinal flexion/extension patterning)
    • Bridge variations (posterior chain recruitment, pelvic control)

    Each of these reveals a different layer of the client’s postural strategy.

    Why This Matters for Teachers and Trainers

    When you understand dynamic posture, you can:

    • identify the real source of a client’s pain or limitation
    • design more effective corrective programs
    • cue with precision instead of guesswork
    • progress clients safely and confidently
    • teach with authority and clarity

    This is the difference between “teaching exercises” and teaching bodies.

    CTA

    If you want to learn how to assess posture dynamically — and how to correct it using matwork, props, and evidence‑based biomechanics — my Postural Assessment Course walks you through the entire process.

  • Rounded Shoulders & Forward Head Posture: What Every Movement Professional Should Know

    Decoding Posture – Post 5

    Rounded shoulders and forward head posture (FHP) are two of the most common alignment patterns seen in clients today — from office workers to athletes to older adults. These postural behaviours that can influence breathing, shoulder stability, cervical spine health, and overall movement efficiency.

    Understanding the why behind these patterns is essential for Pilates teachers, yoga instructors, and movement professionals who want to assess clients with confidence and offer meaningful, evidence‑informed strategies for improvement.

    What Rounded Shoulders & Forward Head Posture Actually Mean

    Rounded shoulders

    A resting position where the humeral heads sit forward in the socket and the scapulae rest in a more protracted, downwardly rotated, or anterior‑tilted position.

    Forward head posture

    A head position where the skull sits forward of the thoracic spine, often accompanied by increased upper cervical extension and lower cervical flexion.

    These patterns often appear together because the body organises itself as a system, not as isolated parts. Each part compensates for what’s happening above or below.

    Why These Patterns Develop

    Common contributors include:

    • Sedentary lifestyles and long hours at screens
    • Stress and breath-holding, which stiffen the upper thorax
    • Dominant movement habits (e.g., cycling, driving, lifting)
    • Age-related changes in thoracic mobility
    • Compensations for hip, foot, or pelvic patterns
    • Emotional states — the “protective” posture of rounding forward

    None of these are inherently harmful. They simply shape the body’s adaptive strategies. But in time, these patterns can lead to various health issues.

    How Rounded Shoulders & FHP Affect Breathing

    Breathing is one of the most overlooked consequences of this postural pattern.

    When the thoracic spine stiffens and the ribcage collapses forward:

    • The diaphragm loses its optimal dome shape
    • The upper chest and neck muscles take over
    • Breath becomes shallow, vertical, and effortful
    • The nervous system shifts toward sympathetic dominance

    Clients may report:

    • Feeling “tight” in the chest
    • Difficulty taking a full breath
    • Fatigue in general and during low‑intensity movement
    • A sense of being “stuck” in their upper body

    Breath is a postural behaviour — and when it changes, posture changes with it.

    Impact on Shoulder Stability

    The shoulder complex relies on a finely tuned relationship between the scapula, ribcage, and humerus.

    Rounded shoulders can lead to:

    • Reduced scapular upward rotation
    • Overactivity of upper traps, pec minor, and levator scapulae
    • Under‑recruitment of lower traps and serratus anterior
    • Narrowed subacromial space
    • Compensatory gripping in the neck and upper back

    This can affect:

    • Overhead mobility
    • Load tolerance
    • Rotator cuff function
    • Stability during pushing/pulling

    For teachers, this is where assessment becomes invaluable — you can see why a client’s shoulder mechanics feel limited.

    Cervical Spine, TMJ & Headache Connections

    Forward head posture increases the load on the cervical spine. Research suggests that for every inch the head moves forward, the effective weight on the neck increases significantly.

    Potential consequences include:

    • Cervical disc compression
    • Facet joint irritation
    • Overactivity of suboccipitals
    • Tension headaches
    • TMJ dysfunction
    • Jaw clenching and bruxism
    • Reduced proprioception and balance

    Clients often describe:

    • “A band of tightness” around the skull
    • Jaw fatigue
    • Clicking or popping
    • Neck stiffness on waking
    • Headaches after long periods at a desk

    These symptoms are not caused by posture alone — but posture can amplify them.

    Why Movement Professionals Should Care

    Because you are uniquely positioned to:

    • Observe patterns others miss
    • Teach clients how to feel their alignment
    • Improve breath mechanics
    • Restore shoulder and cervical mobility
    • Build strength where it’s needed
    • Offer simple, empowering strategies

    Posture is not about perfection — it’s about adaptability.

    Simple Assessment Cues You Can Use Today

    Here are some simple ways to observe this pattern:

    • From the side:
      • Is the ear sitting forward of the shoulder?
      • Is the upper thorax stiff or collapsed?
      • Is the chin lifted or jutting forward?
    • From the front:
      • Are the shoulders level?
      • Do the palms face backward (often a sign of humeral internal rotation)?
    • In movement:
      • Does the ribcage move freely with breath?
      • Do the shoulders hike during overhead reach?
      • Does the neck initiate movements that should come from the thorax?

    These observations help you understand the story behind the posture.

    Supportive Movement Strategies

    Help clients find more options to help improve a rounded shoulders or FHP posture with the following ideas:

    1. Thoracic mobility

    • Cat‑cow variations
    • Thoracic rotations
    • Foam roller extensions and SMR (self myofascial release)

    2. Breath retraining

    • Lateral rib breathing
    • Diaphragmatic expansion
    • Soft exhalation to reduce upper‑chest dominance

    3. Scapular mechanics

    • Serratus anterior activation (eg, Push Ups)
    • Lower trap engagement (eg, Dumb Waiter)
    • Scapular upward rotation drills (eg, Angel Wings, Windmill)

    4. Cervical decompression

    • Axial elongation (attention to posture, eg, crown of the head reaching for the sky; shoulder and neck mobility work; Shoulder position work)
    • Suboccipital release (neck mobility work, SMR with small ball or foam roller)
    • Gentle chin nods (not tucks)

    5. Whole‑body integration

    • Reaching patterns
    • Spirals and rotations
    • Gait‑based movement

    Final Thoughts: Posture Is a Story, Not a Diagnosis

    Rounded shoulders and forward head posture are common adaptations. When we understand the why, we can guide clients (who are often blissfully unaware) towards more ease, better breathing, and healthier movement patterns.

    If you’d like to deepen your assessment skills and learn how to confidently evaluate posture from head to toe, my Postural Assessment Course offers a complete, practical framework for movement professionals.

    It’s designed to help you:

    • Understand postural patterns
    • Assess clients with clarity
    • Build corrective strategies
    • Integrate somatic and functional approaches
    • Feel confident in your teaching
  • RIBCAGE & BREATH: THE HIDDEN POSTURE INFLUENCERS

    How Breath Shapes Alignment More Than We Realise

    Decoding Posture – Post 5

    When we think about posture, most people jump straight to the spine, shoulders, or pelvis. But one of the most powerful — and most overlooked — influencers of alignment is the ribcage. How we breathe, how we feel, and how we move all leave their imprint here.

    The ribcage is not just a protective shell. It is a dynamic, responsive structure that reflects the state of the nervous system, the diaphragm, and the core. When the ribcage becomes stiff, flared, collapsed, or rotated, the entire posture adapts around it.

    Understanding the ribcage is one of the most transformative skills a movement professional can develop.

    Breath as a Postural Behaviour

    Breathing is not just a physiological process — it is a behaviour. And like all behaviours, it adapts to stress, emotion, habit, and environment.

    Common patterns include:

    Shallow breathing

    Often lifts the ribcage upward, creating a sense of “high chest” posture. This can lead to:

    • Neck tension
    • Overuse of accessory breathing muscles (primary breathing muscles are the diaphragm and intercostals)
    • Reduced diaphragm movement
    • Increased lumbar extension if the chest does lift.

    Bracing breath

    Common when clients are told to “engage the core.” This can stiffen the torso, reducing rib mobility, and limits natural spinal motion.

    Emotional breath

    Stress, anxiety, or overwhelm often narrow the ribs and restrict lateral expansion. This can create a collapsed or rounded posture.

    Breath is a direct window into the nervous system — and the ribcage tells the story.

    How Ribcage Position Influences Posture

    The ribcage sits at the centre of the body’s alignment system. If it shifts, everything else shifts to compensate.

    Rib flare

    When the lower ribs lift and angle forward, we often see:

    • excessive lumbar lordosis
    • tight hip flexors
    • overactive back extensors
    • difficulty accessing deep core support

    Collapsed ribcage

    When the ribs drop and narrow, we often see:

    • thoracic kyphosis
    • rounded shoulders
    • forward head posture
    • reduced lung expansion
    • limited rotation

    Rotated ribcage

    One side expands more than the other, often linked to:

    • scoliosis tendencies
    • dominant-side breathing
    • asymmetrical sports or habits
    • compensatory spinal rotation

    These are not diagnoses — they are patterns that help us understand client posture, muscle imbalances and how someone moves.

    Excessive Kyphosis & Rounded Shoulders: How They Affect Breathing

    Excessive thoracic kyphosis and rounded shoulders are among the most common postural patterns seen in modern life.

    What happens in the body?

    • The thoracic spine becomes stiff and less able to extend
    • The ribcage narrows and collapses forward
    • The diaphragm loses space to descend
    • The upper back muscles weaken
    • The chest and anterior shoulder tissues tighten

    How this affects breathing

    • Reduced rib expansion
    • Reliance on neck and upper chest muscles
    • Shallow, rapid breathing
    • Difficulty accessing lateral and posterior rib movement
    • Increased sympathetic (fight-or-flight) tone

    Even though the thoracic spine is long and designed for mobility, this posture often makes it one of the stiffest regions of the body.

    Breath, Core Activation & Pressure Regulation

    The diaphragm, pelvic floor, deep abdominals, and ribcage work as a pressure system. When the ribcage is stiff or misaligned, this system cannot function optimally.

    A well‑functioning breath–core system allows:

    • natural core activation without bracing
    • better spinal support
    • improved pelvic alignment
    • smoother movement
    • reduced back tension

    A poorly functioning system leads to:

    • gripping
    • over-bracing
    • shallow breathing
    • increased spinal load
    • reduced mobility

    Breath is not separate from posture — it is posture.

    Pilates & Yoga Exercises to Improve Ribcage Mobility and Breath

    Here are some effective, accessible movements you can include in your teaching:

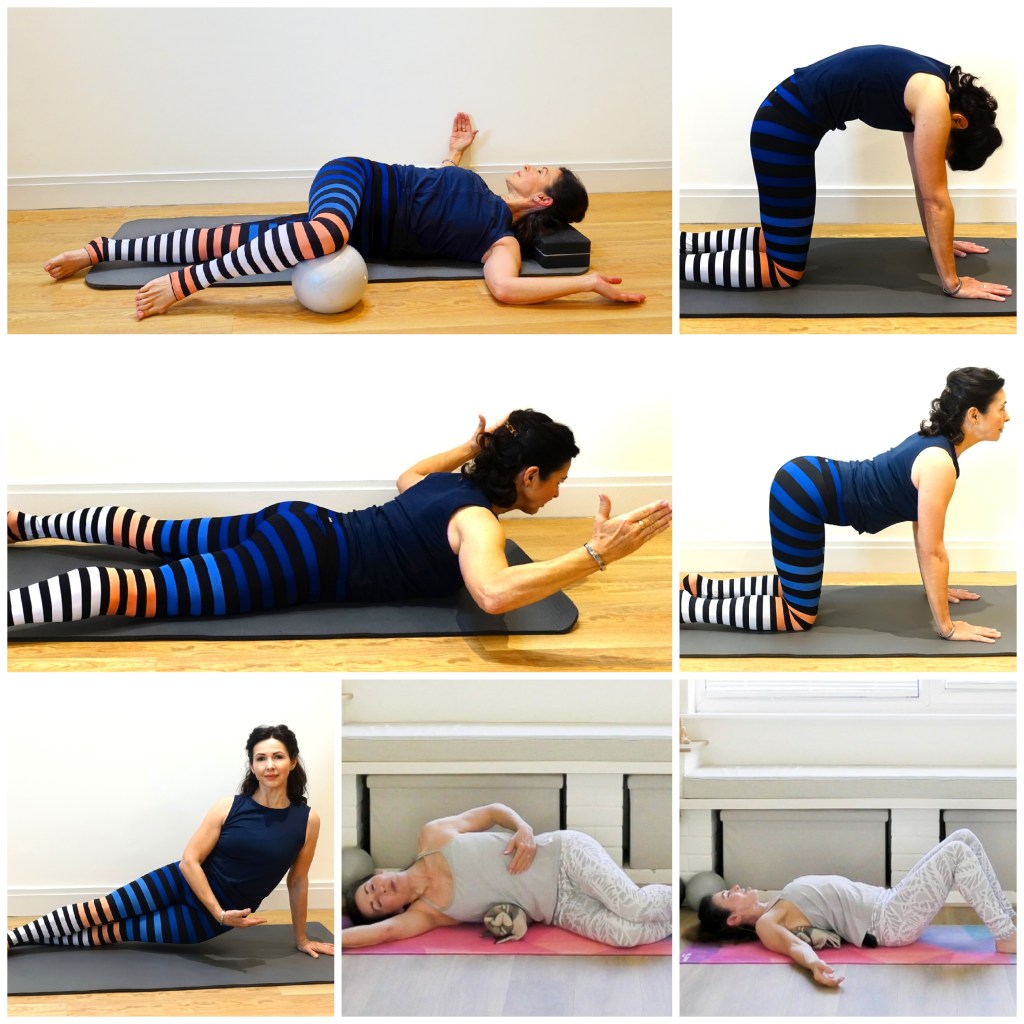
    1. Cat–Cow with Breath Focus

    • Inhale: expand ribs and lift sternum as you extend the spine
    • Exhale: soften ribs and round gently
    • Improves mobility of the spine and ribcage, rib–spine coordination.

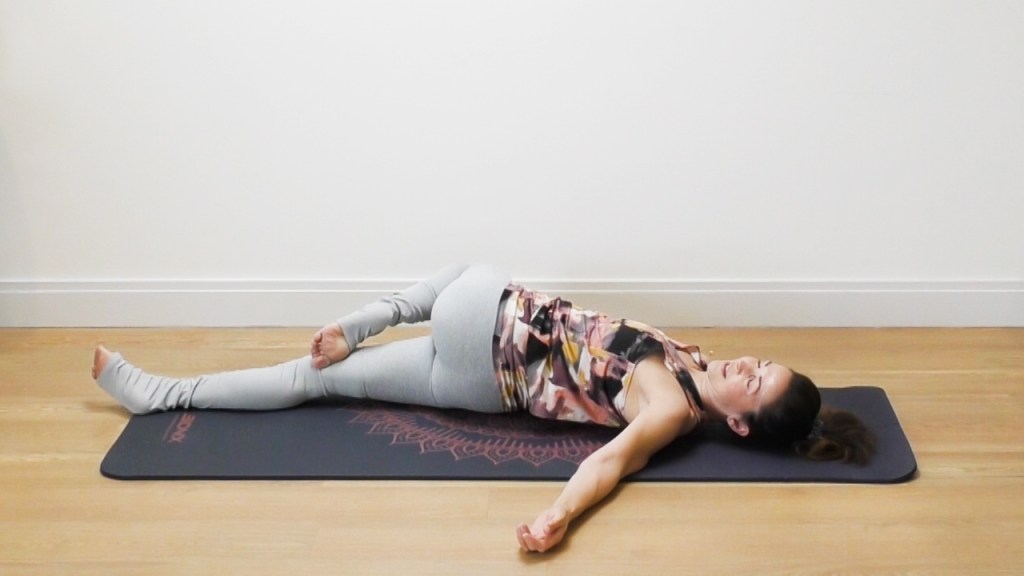
    2. Side Lying Spine Twist

    • Encourages thoracic rotation and therefore, mobility
    • Opens the chests and front of shoulders
    • Reduces upper/mid‑back stiffness

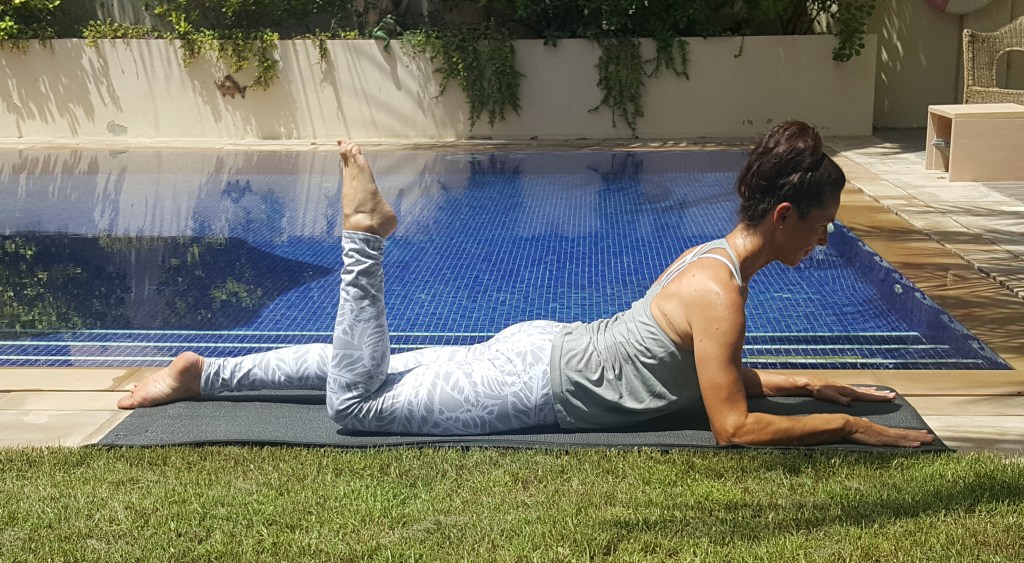
    3. Spine Extension

    • Strength work for the mid back
    • With arms in a U shape and attention to positioning, this version offers great benefits to upper body posture.

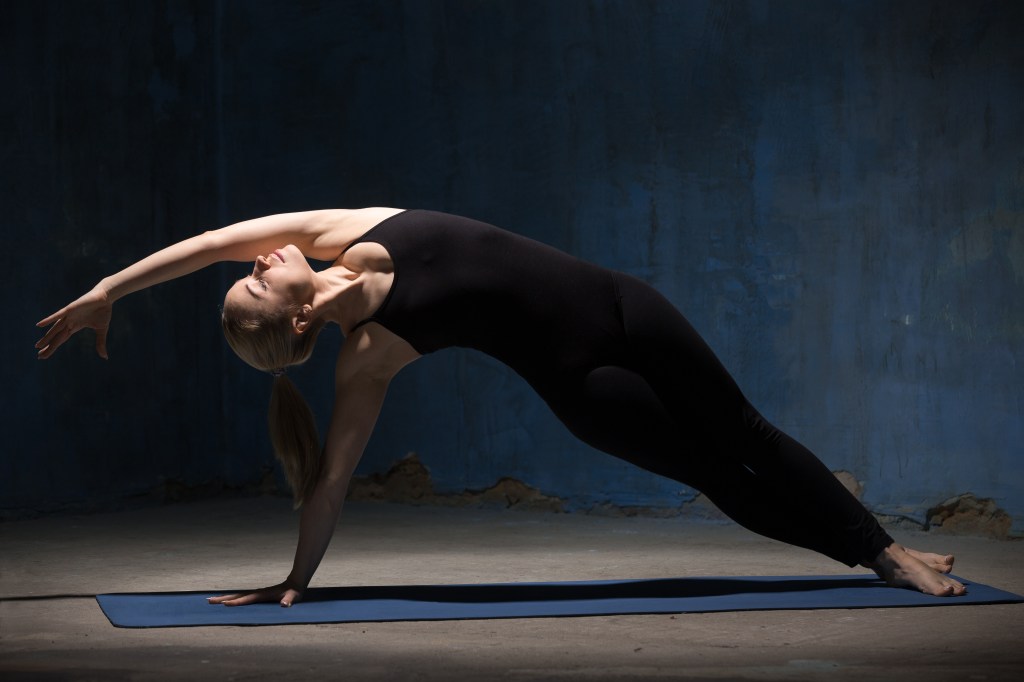
    4. Lateral Flexion

    • Opens up the side ribs, so be aware of the possible difference each side
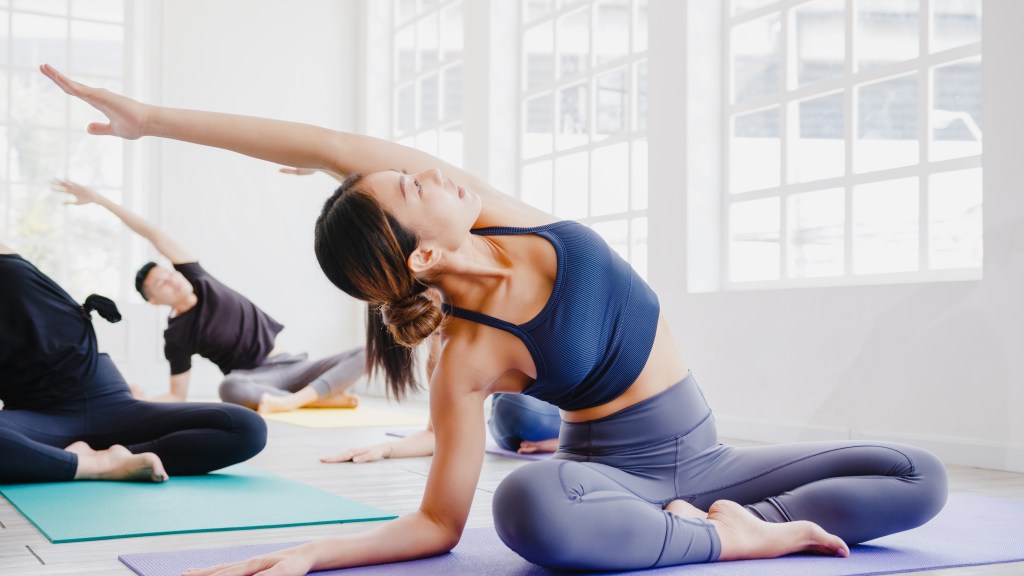
    • Lots of variations, from the more accessible in the main image, or the Pilates Side Bend. When able, the full version offers a full range of motion, making it very effective. The added benefit of strength work

    5. Rib/Thoracic Spine Breath work

    • Placing a rolled towel under the ribs on one side of the body allows you to focus entirely on those side ribs.
    • Placing the roll in the mid back area (adjust as necessary) and laying supine over it opens the chest, front ribs and shoulders
    • You can rest in Savasana or Childs Pose (the latter has the added benefit of the focus moving to the back ribs.
    • Counteracts kyphosis and rounded shoulders

    These exercises help restore mobility, balance, and breath–core synergy.

    A Simple Breath Awareness Exercise

    Place your hands on your lower ribs. Inhale softly and fully into the sides, allowing the torso to move as it wants to. Exhale without collapsing. Notice how the spine responds. There should be a natural extension/gentle flexion of the spine on the inhalation/exhalation. As you improve your thoracic and ribcage mobility, you will begin to notice the natural rhythm. You will also become far more aware of the natural relaxation/contraction of the core muscles.

    If you want to learn how to interpret ribcage patterns, breathing behaviours, thoracic compensations and other postural topics, my Postural Assessment & Correction Course includes assessment tools and workshops that help you understand what the posture is really telling you.

  • THE SPINE: CURVES, NOT STRAIGHT LINES

    Why “Stand Up Straight” Doesn’t Work

    Decoding Posture: Post 4

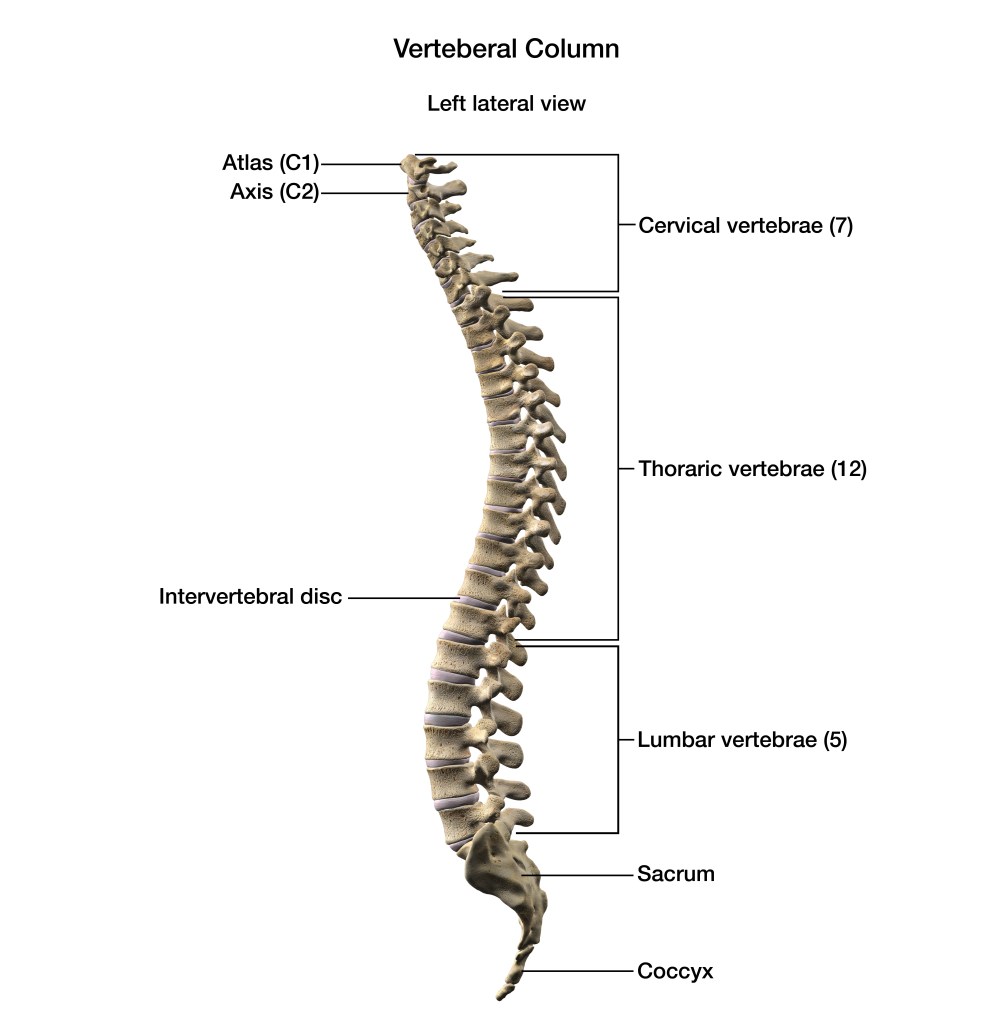
    The spine is not meant to be straight. It’s a beautifully engineered series of curves designed to absorb load, distribute force, and allow fluid, adaptable movement. When we tell clients to “stand up straight,” we often push them away from their natural alignment and into bracing, gripping, and overcorrection.

    Why the Spine Has Curves (and Why They Matter)

    The spine’s curves are not flaws — they are functional architecture and essential for our health. Each curve plays a specific role:

    Cervical lordosis (neck curve)

    • Positions the head over the body
    • Allows shock absorption during walking and running
    • Supports visual orientation and balance

    Thoracic kyphosis (mid‑back curve)

    • Protects the heart and lungs
    • Allows rotation for gait, turning and reaching
    • Helps distribute load through the ribcage

    Lumbar lordosis (lower‑back curve)

    • Supports upright posture
    • Allows hip–spine coordination
    • Absorbs compressive forces during standing and lifting

    Together, these curves create a spring-like system that manages load far better than a rigid, straight column ever could.

    What Happens When Curves Are Too Much or Too Little?

    Spinal curves naturally vary, but when they become exaggerated or flattened, the body often compensates elsewhere.

    When curves are excessive

    Examples:

    • Hyperlordosis (excessive lumbar curve)
    • Hyperkyphosis (excessive thoracic rounding)

    Possible consequences:

    • Lower‑back compression
    • Facet joint irritation
    • Ribcage collapse and restricted breathing
    • Neck strain from forward head posture
    • Hip flexor overactivity or gripping

    When curves are reduced

    Examples:

    • Flat lumbar spine
    • Reduced thoracic kyphosis
    • Military or Flat Back posture

    Possible consequences:

    • Disc pressure increases
    • Reduced shock absorption
    • Overuse of superficial muscles
    • Stiff, braced movement patterns
    • Difficulty accessing natural spinal rotation

    These patterns are not diagnoses — they’re simply observations that help us understand how someone moves, where muscle imbalances may be and how we can help our clients.

    Why We Shouldn’t Guess or Label Clients

    As movement professionals, we see patterns — but we do not diagnose.

    Two people can look similar externally but have completely different underlying causes:

    • One person’s hyperlordosis may be structural
    • Another’s may be habitual
    • Another’s may be a protective response to pain
    • Another’s may be linked to breathing mechanics

    This is why guessing is risky. It can lead to:

    • Overcorrecting a pattern that doesn’t need correcting
    • Giving exercises that aggravate symptoms
    • Misinterpreting a structural variation as a “fault”
    • Missing red flags that require medical input

    A proper diagnosis — when needed — must come from a qualified clinician.

    Our role is to observe, interpret movement, and guide clients safely, not to label or pathologise.

    How to Spot Habitual Patterns

    Look for subtle, consistent tendencies such as:

    • A stiff or immobile thoracic spine
    • A collapsed or rigid ribcage
    • Excessive lumbar gripping
    • A forward‑shifted ribcage
    • A tucked or untucked pelvis influencing spinal curves
    • Breath patterns that reinforce tension
    • Where the weight is on the feet

    These patterns tell a story — not about “good” or “bad” posture, but about how someone has adapted to their life, habits, and history.

    If you want to learn how to interpret spinal patterns and understand the deeper relationships between breath, pelvis, gait, and spinal curves the Postural Assessment & Correction Course offers a practical, compassionate, research‑informed approach with lots of practical workshops.

  • The Psoas: Why This Deep Core Muscle Matters More Than We Thought

    Another supplementary post for my Decoding Posture series Post 3 about the hips before we move to post 4.

    The psoas has always held a certain mystique — the “deep hip flexor,” the “fight-or-flight muscle,” the “emotional storehouse” – if you’ve taken my Pilates Teacher Training Course, you will have studied it in depth in the Psoas lecture. But beyond the myths, current scientific research is giving us a far clearer, more functional understanding of what the psoas actually does, how it behaves under load, and what it needs to stay healthy.

    And the truth is far more interesting — and far more useful — than the old “tight psoas = stretch it” narrative (still happening).

    This post is part of my Decoding Posture series and links directly to the principles I teach inside my Postural Assessment & Correction Course, where we explore the psoas in relation to pelvic alignment, breathing mechanics, gait, and compensatory patterns.

    What the Latest Research Reveals About the Psoas

    1. It’s a stabiliser first, a mover second

    EMG studies show that the psoas fires reflexively to stabilise the lumbar spine during walking, standing, and transitional movements. It’s not designed to be a big, powerful prime mover — it’s designed to be responsive, reactive, and coordinated with the diaphragm, pelvic floor, and deep abdominals.

    This means:

    • A “tight” psoas is often a tense psoas
    • A “weak” psoas is often an overworked psoas
    • A “short” psoas is often a protective psoas

    2. It’s deeply connected to the nervous system

    The psoas has direct fascial and neurological links to the diaphragm and lumbar plexus. Research into autonomic regulation shows that chronic stress, shallow breathing, and prolonged sitting can increase baseline tension — making the psoas feel tight even when it isn’t structurally short.

    This is why breathwork changes everything and somatic movement is a very useful form of therapy that complements Pilates perfectly.

    3. Strength and load tolerance matter more than stretching

    Recent hip flexor studies show that eccentric strength, load tolerance, and movement variability improve hip extension, reduce low-back discomfort, and restore functional length far more effectively than passive stretching.

    In other words:

    A strong, well-coordinated psoas is a long psoas.

    4. Walking is the psoas’ natural rhythm

    Gait research consistently shows that the psoas activates most efficiently during reciprocal movement — the gentle, rhythmic loading and unloading of walking.

    If you want a healthy psoas, you need:

    • Hip extension
    • Arm swing
    • Thoracic rotation
    • A relaxed, responsive diaphragm

    5. It thrives on variety, not stillness

    The psoas hates being held in one position — whether that’s sitting, gripping, or “standing tall” with braced abdominals. It responds beautifully to:

    • Rotation
    • Side bending
    • Spirals
    • Dynamic hip extension
    • Breath-led movement

    The Breath–Psoas Connection

    Because of its intimate relationship with the diaphragm, breathing is one of the fastest ways to influence psoas tone.

    When the diaphragm moves well:

    • The psoas softens
    • The lumbar spine decompresses
    • The pelvic floor responds reflexively
    • The nervous system shifts toward safety (releases tension)

    When the diaphragm is restricted:

    • The psoas grips
    • The ribs flare or compress
    • The pelvis tilts
    • Compensations appear everywhere

    How Pilates Supports a Healthy, Functional Psoas

    Pilates is uniquely positioned to support psoas health because it emphasises:

    • Dynamic stability rather than bracing
    • Eccentric control of the legs
    • Spinal mobility to reduce compensations
    • Breath integration to calm the nervous system
    • Hip extension to counter modern sitting habits
    • Movement variety across all planes

    This combination is exactly what the psoas thrives on.

    Try These Psoas-Friendly Pilates Moves

    • Single Leg Kick
    • Scissors on the shoulders
    • Straight Leg Single Stretch
    • Advanced Shoulder Bridge
    • All Supine Core exercises
    • Side Bends and Side Kicks
    • Leg Circles with spine twist phase

    🎓 Want to Understand the Psoas on a Deeper Level?

    Inside my Postural Assessment & Correction Course, we explore:

    • How to assess psoas function without relying on outdated “length tests”
    • How pelvic alignment influences psoas behaviour (and vice versa)
    • How breathing patterns alter posture
    • How to identify compensations in gait and standing posture
    • Practical corrective strategies you can use with clients

    As a movement professional, understanding client posture and finding functional ways to help correct imbalances is essential and makes the teacher/client relationship more valuable.

  • STATIC vs DYNAMIC STABILITY — Why Pilates Trains Both

    Pilates Twister

    In my recent post 3 in the Decoding Posture, I talked about stability which can be a confusing subject, so I wanted to add this brief extra supplement to explain in a little more depth.

    When people hear the word stability, they often imagine “holding still.” But in Pilates, stability is so much more than staying in one place.

    There are two types we train:

    Static Stability

    This is your ability to maintain control when the body is not moving.

    Think of:

    • The Hundred and other supine core exercises
    • Holding a plank
    • Balancing on one leg
    • Maintaining neutral pelvis in a bridge set‑up

    Static stability builds deep support, awareness, and postural endurance. It teaches the body how to organise itself efficiently before movement begins.

    Dynamic Stability

    This is your ability to stay controlled while the body is moving.

    Think of:

    • Leg circles with the advanced pelvic rotation
    • Walking with smooth pelvic rotation
    • Rolling like a ball with fluid control or Corkscrew
    • Side Bend or Twister
    • Reaching, twisting, lifting, bending

    Dynamic stability is what keeps us safe in real life — when we’re carrying shopping, climbing stairs, playing sports, or reacting to uneven ground.

    Why Pilates Is So Effective

    Pilates trains both forms of stability by integrating:

    • Breath
    • Deep core activation
    • Controlled mobility
    • Alignment awareness
    • Smooth transitions

    You learn not just to hold stability, but to move through it — which is where true functional strength lives.

    A Helpful Way to Think About It

    Static stability = setting the foundation

    Dynamic stability = moving from that foundation

    Both are essential for posture, balance, and confident movement at any age.

    If you’d like to refine your eye for pelvic patterns, the Postural Assessment Course breaks this down with simple frameworks, real‑world examples, and practical assessment tools you can use immediately.

  • HIPS & PELVIS: THE POSTURE POWER CENTRE

    Decoding Posture: Post 3

    Understanding the Body’s Central Hub

    If the feet are the foundation of posture, the pelvis is the power centre. It’s one of the most misunderstood regions in movement work — often blamed for back pain, hip tightness, “poor posture,” or instability — yet the pelvis is usually doing its best to adapt to forces coming from above and below.

    A pelvis that appears “tilted,” “rotated,” or “stuck” is often responding to:

    • Habitual movement patterns
    • Breath mechanics
    • Load distribution
    • Emotional holding
    • Compensations from the feet, hips, or upper body alignment

    The pelvis is designed to move, tilt, rotate, and shift. Problems arise not because it moves, but because it becomes restricted or habitually fixed outside of its neutral zone.

    Neutral Pelvis & Core Stability — The Foundation of Efficient Movement

    In Pilates, we talk about “finding neutral,” one of the first things we teach our clients. It’s essential in order to strengthen and train the core muscles to do their stabilising job. We also need to remember that neutral is a dynamic relationship during movement in our daily lives. A neutral pelvis allows the spine to maintain its natural curves, the diaphragm and pelvic floor to work as a team, and the deep stabilisers to switch on with minimal effort. It helps stabilise, protect and prevent injury, enabling efficient movement.

    Why Neutral Matters for Posture

    A well‑organised pelvis supports:

    • Efficient load transfer through the spine
    • Balanced hip mobility
    • Optimal breathing mechanics
    • Reduced compensatory tension in the lower back
    • Better shock absorption during gait

    When the pelvis is chronically anteriorly or posteriorly tilted, the stabilising system has to work harder, often leading to fatigue, gripping, or over‑recruitment of global muscles.

    Meet the Deep Stabilisers — The Heroes of Pelvic Alignment

    To understand pelvic posture, we must understand the core stabilising system. These muscles don’t create big movements; they create control, support, and timing.

    The Key Players

    • Pelvic Floor — supports organs, manages pressure, and stabilises the pelvis from below
    • Transversus Abdominis (TA) — wraps around the torso like a corset, providing 360° support
    • Multifidus — segmental stabiliser of the spine, crucial for fine‑tuned control
    • Diaphragm — the top of the core canister; its movement directly influences pelvic and spine position
    • Internal obliques – essential for core stabilisation and force control of the lumbar spine, thorax, pubic symphysis and sacroiliac joint.

    When these muscles work in harmony, the pelvis naturally finds its most efficient alignment. When they don’t, the body compensates — often through gripping the glutes, overusing the hip flexors, or bracing the abdominals.

    A Helpful Cue for Clients

    When teaching neutral position, try shifting the focus from a strict position to function.

    “Let your pelvis settle into a place where your breath feels easy in a wide open ribage and your spine feels long.”

    How to Observe Pelvic Patterns (for Movement Professionals)

    In Standing

    • ASIS/PSIS (hip bones/pubic bone) relationship — is there an obvious tilt?
    • Weight distribution
    • Hip height differences
    • Ribcage relationship
    • In Movement
    • Squat/hinge test
    • Walking gait
    • Load response

    These observations help you understand why a client moves the way they do and where you can help them.

    Common Pelvic Patterns You’ll See

    Posture tells a story.

    • Anterior Tilt — often paired with tight hip flexors, rib flare, or lumbar extension
    • Posterior Tilt — common in those who grip their glutes or brace their abdominals
    • Lateral Shift — weight habitually sits on one leg
    • Pelvic Rotation — sometimes linked to gait asymmetry or dominant‑side patterns

    Each pattern has a reason. Your job is to observe, understand, and guide.

    Helping Clients Find Their “Ideal” Pelvic Alignment

    Posture is not a fixed shape — it’s a responsive, adaptable state. Encourage clients to explore:

    • Breath‑led pelvic movement (for example, pelvic tilts with the breath)
    • Hip mobility in all planes
    • Gentle core activation without bracing (encourage modified versions)
    • Awareness of weight distribution

    A pelvis that can move freely can also stabilise effectively.

    Final Thoughts

    The pelvis is the bridge between the upper and lower body — a dynamic hub that influences every movement pattern. When we understand its behaviour, we can help clients move with more ease, efficiency, and confidence.

    If you’d like to refine your eye for pelvic patterns, the Postural Assessment Course breaks this down with simple frameworks, real‑world examples, and practical assessment tools you can use immediately.

  • ANKLES & KNEES: THE SHOCK ABSORBERS

    Decoding Posture Series: Post 2

    How the Lower Leg Shapes Whole‑Body Alignment

    When we look at posture, the ankles and knees often get overlooked — yet they’re two of the most revealing joints in the entire kinetic chain. They tell us how the body manages load, absorbs force, and adapts to the patterns that begin at the feet. The first time I ever thought about reduced ROM in the ankle and witnessed the impact on the rest of the body was when I started teaching yoga. Some clients struggled to sit back into Child’s Pose; inability to go all the way down into Malasana (deep squat to the floor); knee drift and foot turnout in Utkatasana (Chair Pose/squat).

    Why ankles and knees matter in posture assessment

    These joints act as the body’s natural shock absorbers. When they move well, the whole system feels smoother and more efficient. When they stiffen, collapse, or rotate excessively, the body compensates above.

    Common patterns you’ll see:

    • knees drifting inward (valgus)
    • knees bowing outward (varus)
    • ankles collapsing medially
    • ankles rolling outward
    • limited dorsiflexion affecting gait and squat patterns

    These are common adaptations.

    How foot mechanics influence the knees

    A pronated foot often creates an inward spiral up the leg. A supinated foot often creates an outward spiral. But both influence knee tracking.

    What to observe:

    • Does the knee track over the second toe?
    • Does one knee behave differently from the other?
    • Does the knee collapse inward during load?
    • Does the client “lock” their knees in standing?

    Neutral as a behaviour

    Neutral knee alignment isn’t just a fixed position: it’s the ability to move through neutral with ease.

    Look for:

    • smooth transitions
    • balanced weight distribution
    • the ability to bend without collapsing
    • the ability to straighten without discomfort

    Simple awareness tests

    • Stand on one leg — what happens at the knee?
    • Try a slow mini‑squat — does the knee drift?
    • Walk barefoot — do the knees rotate inward or outward?

    Biomechanics: what’s happening under the surface

    A useful way to think about the ankle–knee relationship is rotation. When the foot pronates to accept load, the arch lowers and the tibia often follows with a small amount of internal rotation. If the hip can’t control that rotation (or the ankle/foot collapses too quickly), the knee may drift inward. With a more supinated foot, the tibia tends to rotate outward and the knee may sit more “bowed” (varus) or struggle to absorb force smoothly.

    Dorsiflexion matters because it’s one of the main ways we decelerate bodyweight during walking, stairs, and squat patterns. If the ankle can’t flex, the body comensates: the foot may turn out, the arch may roll inwards, the heel may lift early, or the knee may travel medially to find range. Those compensations are useful clues in assessment.

    Screening Tell Tale Signs

    Squat to stand or a wall squat: early heel lift, foot turnout or valgus. What it might suggest: limited dorsiflexion range or dorsiflexion not well controlled under load.

    Shoulder Bridge: the supporting foot “claws” at the mat or rolls in/out, the pelvis drops/hitches, the knee loses stability and alignment as weight shifts during foot switch. What it may suggest: reduced foot tripod organisation and/or a hip control demand for which the client is not yet ready.

    Mini case study: knee drift in a squat pattern

    Client presents with tendency towards valgus during sit-to-stand test and there is evidence of instability on single-leg tasks. In natural standing posture, you notice that one foot and and the knee on the same side roll inwards slightly. In a slow mini-squat, the tibia appears to internally rotate as load increases, the heel wants to lift early, and the knee tracks the big toe rather than the second toe. A quick knee-to-wall check suggests reduced dorsiflexion compared with the other side. You then have to continue to observe to decide whether it is a foot/ankle ROM issue, foot control issue or hip control issue.

    The Knee to Wall Test assesses ankle dorsiflexion by measuring how far the foot can be from a wall while the knee touches it without the heel lifting. Adequate dorsiflexion is essential for proper gait, squatting, and weight-bearing activities. Limited mobility can contribute to conditions like knee pain, overpronation, or plantar fasciitis.

    You can help this client by restoring dorsiflexion, improving awareness of the foot tripod and work on hip external rotation/abduction. When you retest the mini-squat or single leg work, hopefully you will see better knee tracking.

    Useful Cues

    • “Track the knee over the second toe” or “keep the heel heavy as you bend”.

    Note: discomfort can have many contributors: if pain is sharp, worsening, or persistent, seek assessment from a qualified health professional.

    If you want to deepen your ability to read these patterns in clients, my Postural Assessment course explores posture in much more detail.